Baby Mattresses

Posted on 1 Comment

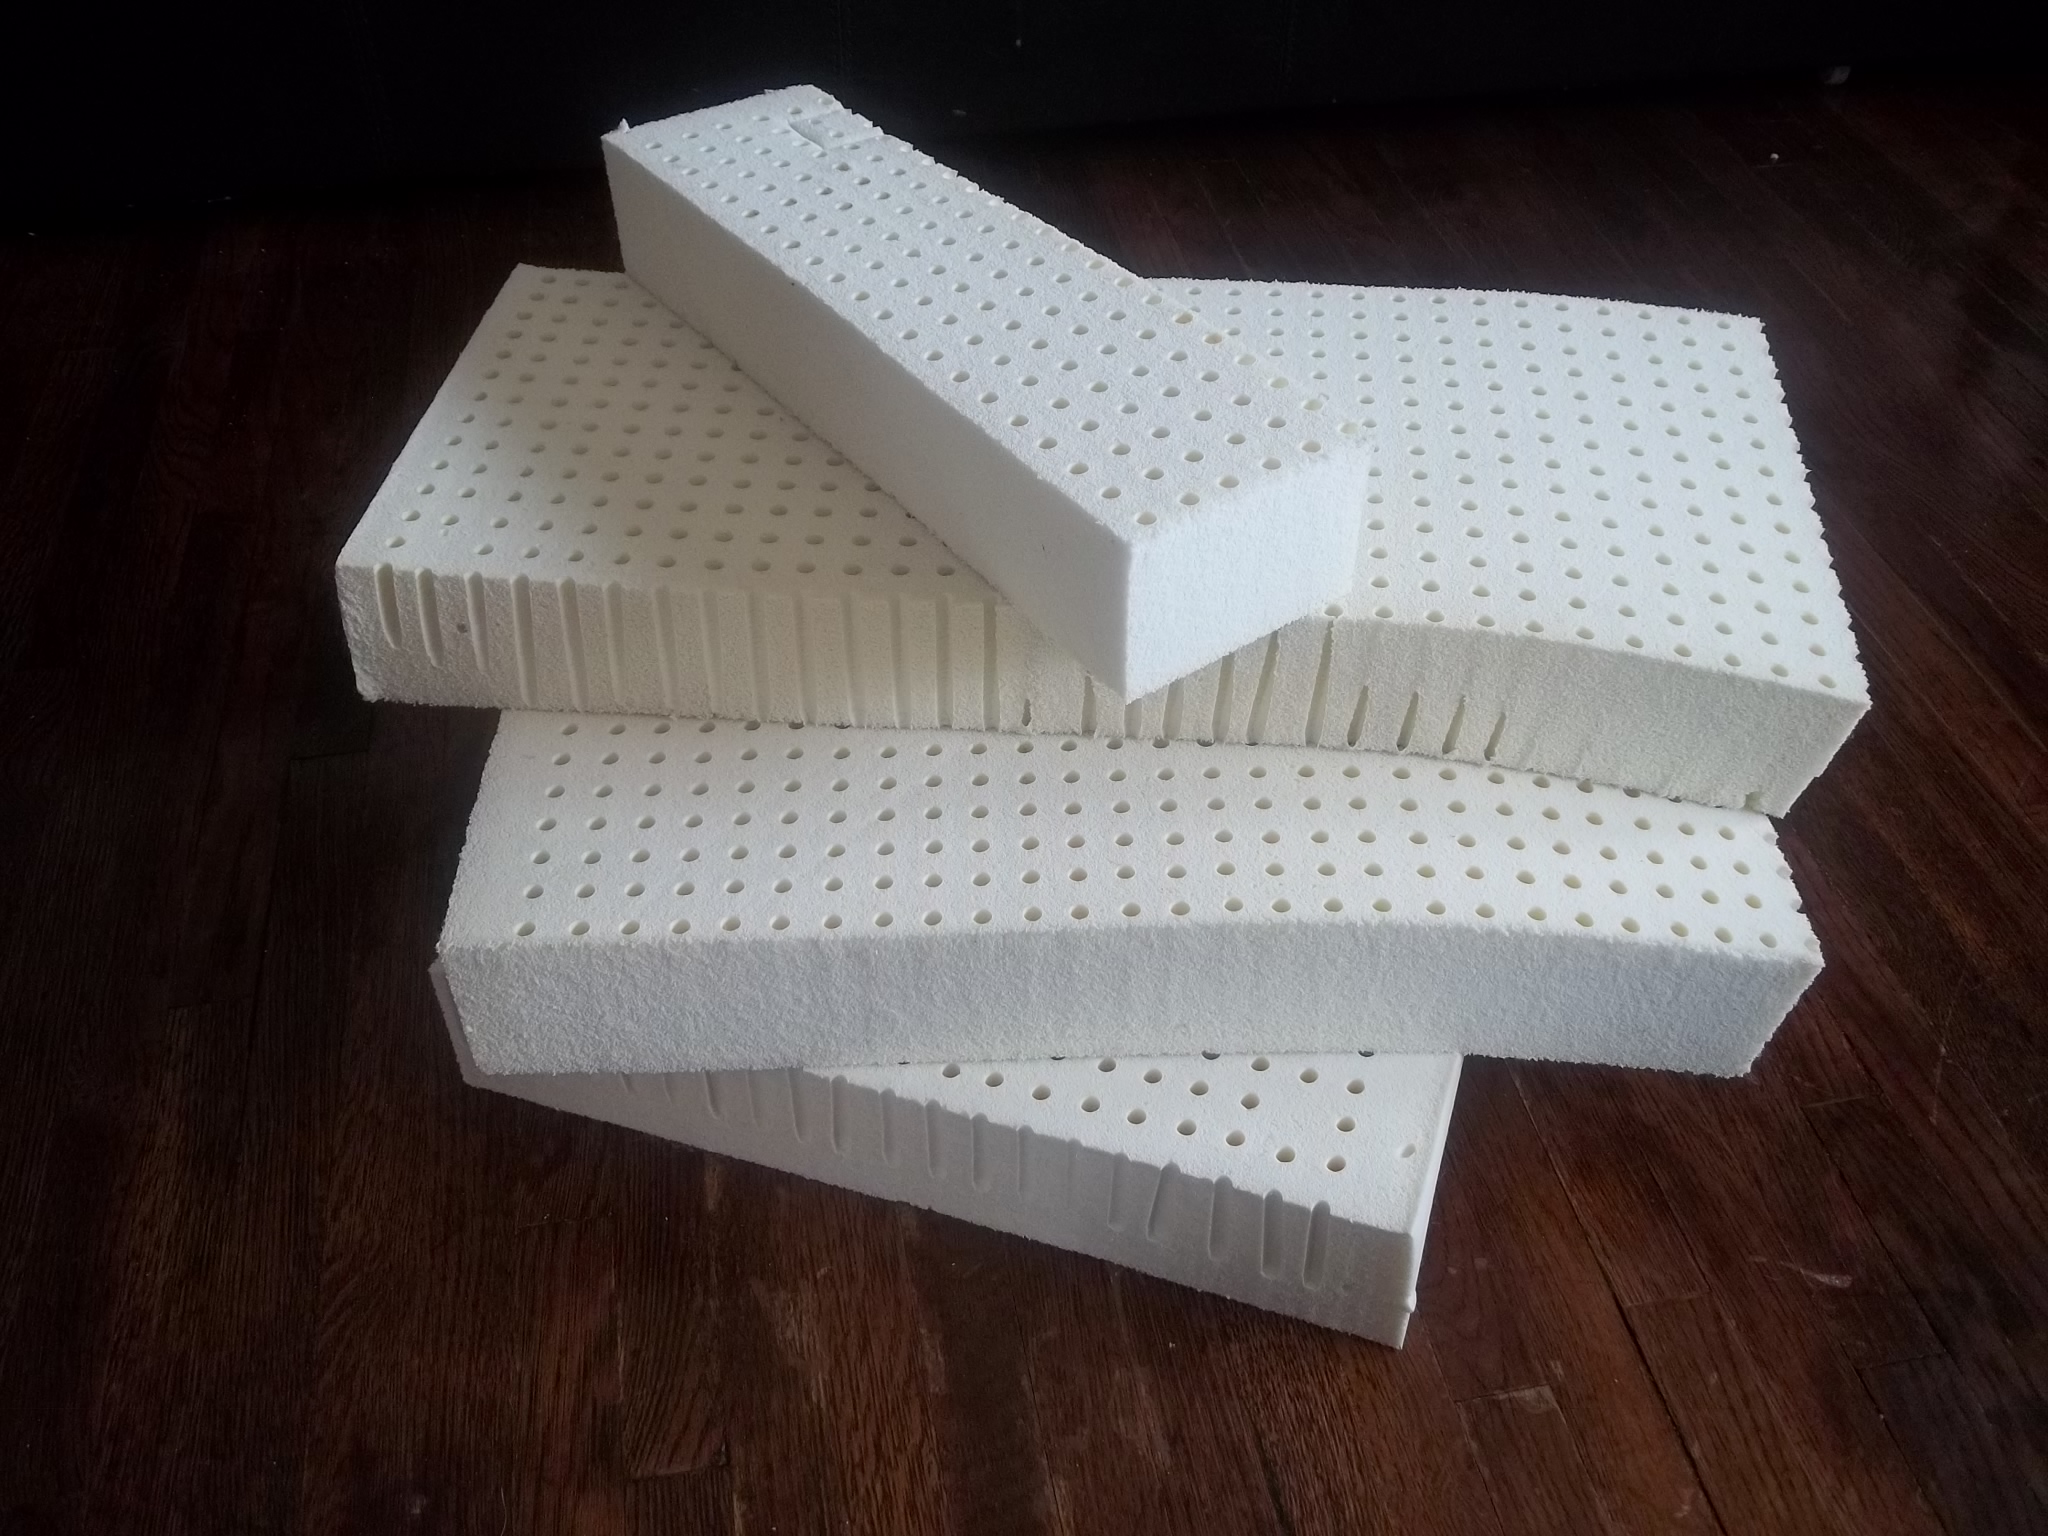
Since we have cut quite a few pieces of latex over the years for infant bassinets, playpens, crib mattresses, etc., I thought I would share a few tips we have learned along the way. If you have feedback on your particular brand’s frame and how our products work with it, let me know and I’ll add it to this post.

Keep in mind that we cut and sew to your dimensions. We can cut latex, sew puddle pads, sheets, tickings, receiving blankets, you name it. Contact us for a quote or see the latex calculator here.

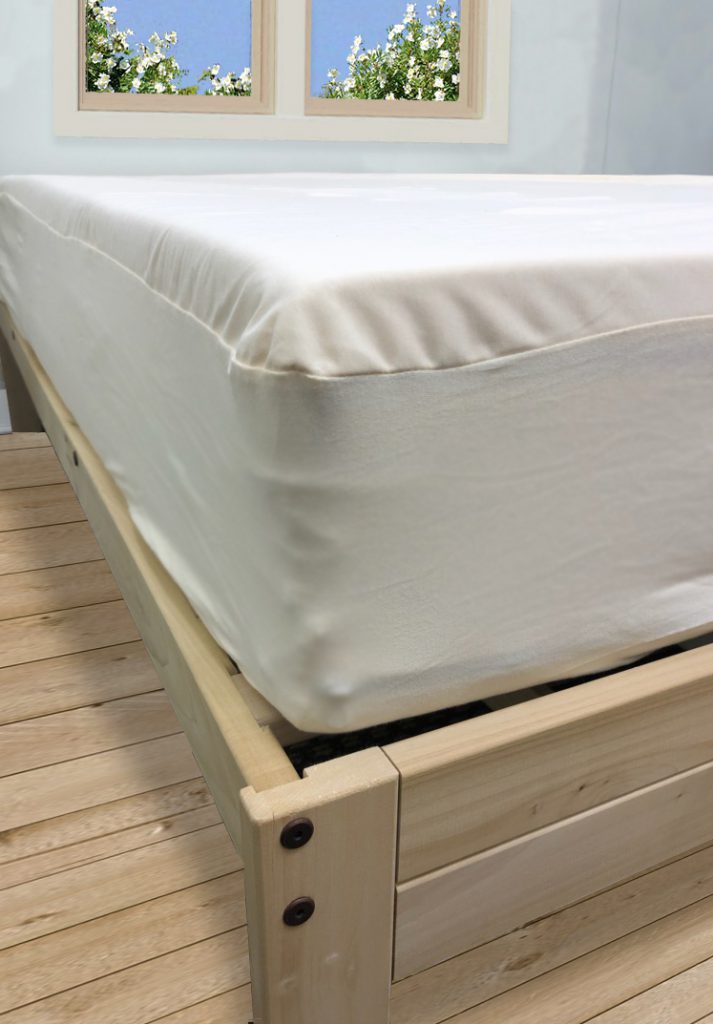
TIP 1: Cut the latex 1″ larger and sew the ticking 1/2″-1″ larger.

Latex is very flexible. That translates to when we cut it to the exact inside dimensions of your crib, you may find that the ticking or even sheet will pull it a little bit smaller than we cut it. While the mattress will still be completely usable, of course, not having that extra 1/2″ of nothing between the side wall.

The softer the latex is, the more flexible it is. So even a 3″ soft will be constrained by the sheets and ticking.

Tip 2: Latex can be cut down to .5″ in a Hard D90 firmness only.

Again, latex is very flexible and the softer layers are too floppy to cut thinner. To note, the thinner the latex is, the softer it feels, so if you are wanting a firm, thin surface for your infant, a hard is a great way to achieve that feel.

Tip 3: Most parents want firm mattresses for their infants.

If your child is able to roll over, I encourage you to consider all the firmnesses we offer, from Soft to Hard as options. A 3″ soft adds significant comfort to those hard pack n’ play mattresses, but is not firm. Keep in mind that little bodies sink through only a little and a soft feels super squishy to us and only a little squishy to them.

Brands

  • Snoo Mattress: Cut hard latex to .75″.
  • Guava Lotus travel crib: The crib sides are much more flexible than a regular pack n play, so add an extra .5-1 inch on all sides of the latex pad for it to not have gaps between the mattress and the mesh walls.

Pillow Fill Comparison

Posted on Leave a comment

Have you been wondering what each of our natural pillow fills feels like? Whether they are used for bed pillows, couch pillows, pregnancy pillows, body pillows, support pillows, the feel will change based on how much you stuff your pillow. That is the beauty of zippers, they make everything customizable.

FullUnderfilled
Shredded Latex**BouncyFloppy
Kapok*FirmFluffy
Woolly BolasSoftClumpy
Wool Batting*PuffyThin
Millet HullsContouringHeavy

Create your own feel by mixing fill or by combining fills in our double pocket pillow case.

Bed sized pillow kits available here. Custom sized pillow cases available, just ask.

* Fill will compress over time, expect to add more fill once a year to restore it to its original loft
**Fill is certified GOTS organic.

Wool Puddle Pad vs. Waterproof Jersey Puddle Pad

Posted on Leave a comment
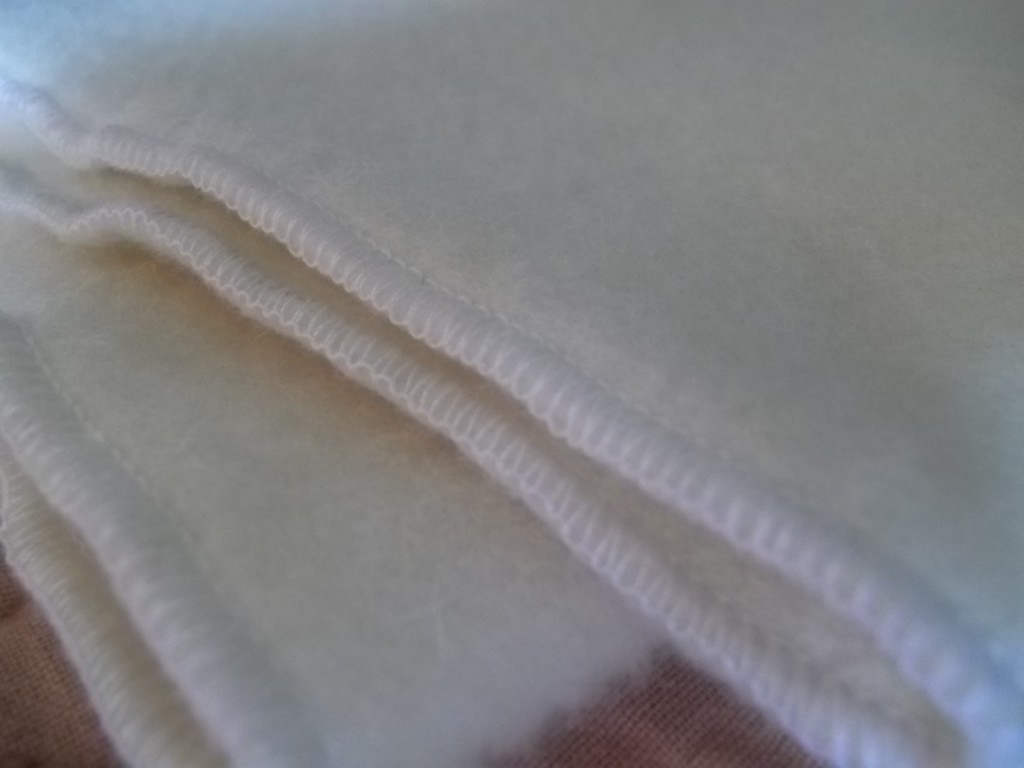
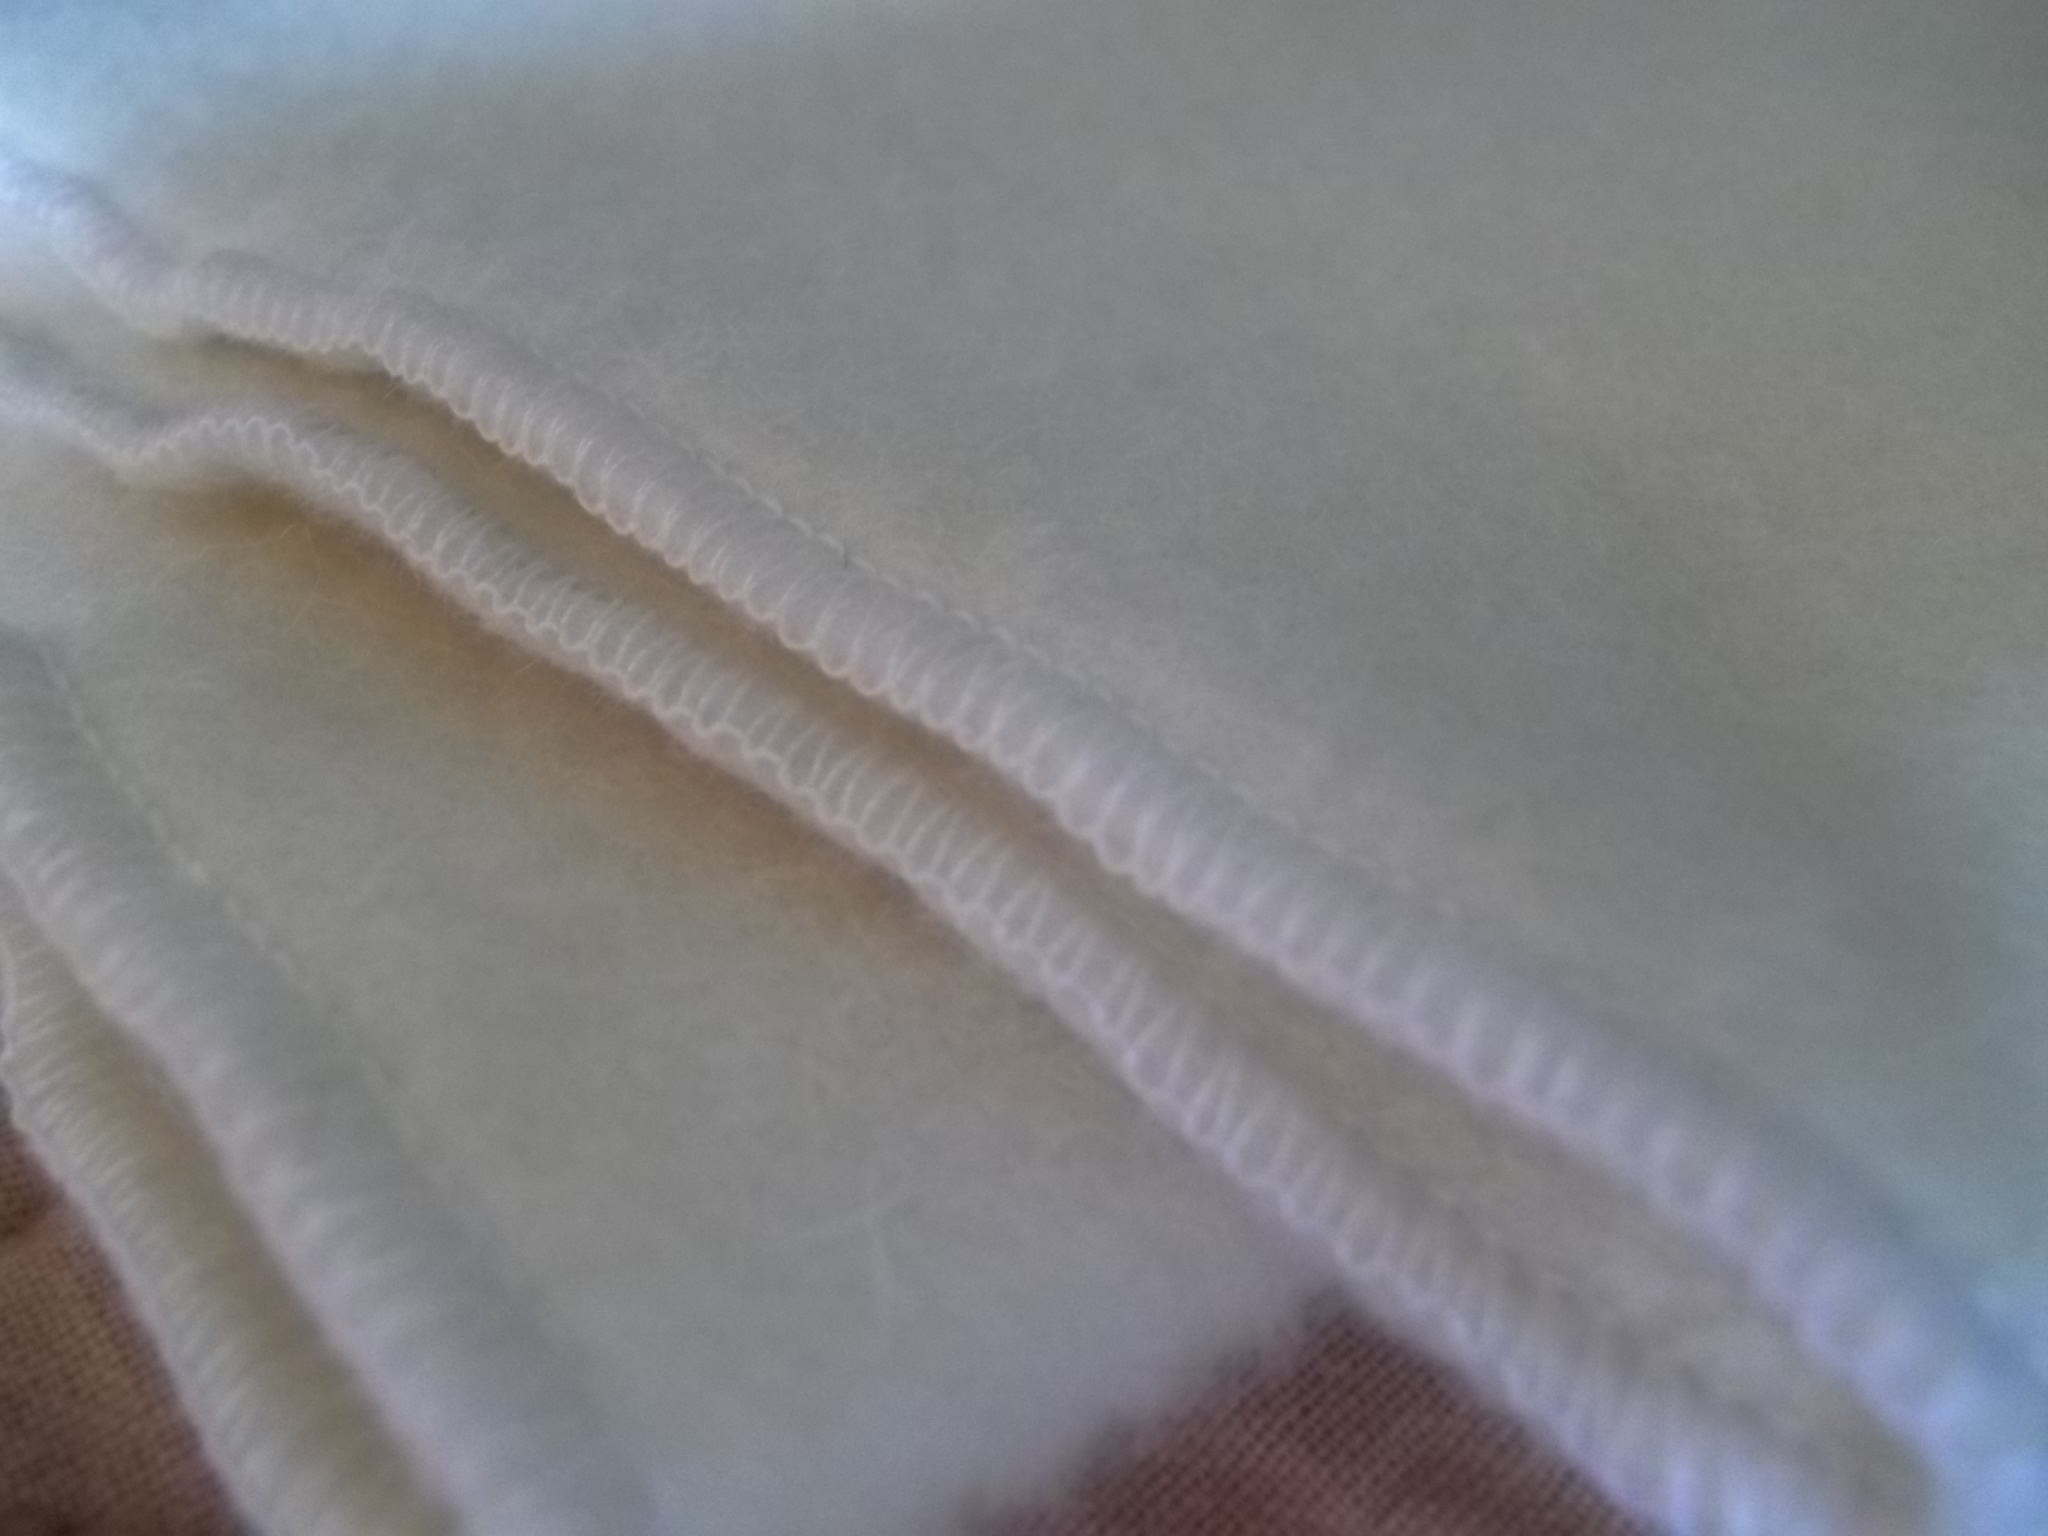
Organic Needle Punched Wool Puddle Pad Serged Edges

We sell two mattress protectors, a wool puddle pad and a waterproof jersey puddle pad. Both are certified organic. While both puddle pads work well against messes, they work differently and both have their pros and cons.

WOOL PUDDLE PAD

Organic Needle Punched Wool Puddle Pad Serged Edges

The wool puddle pad works because the wool fibers are so tightly felted together. Their physical mass as well as their ability to absorb the mess without leaving odors behind make the wool fibers quite unique. Some large spills may get through, but they will be few and far between. The absorption of the fibers is actually a neat trick, because not only does the wool dry quickly since the fibers are hollow and excellent at airflow, the wool also keeps the spill from spreading down the side of your mattress and everywhere else.

Another plus of the wool puddle pad is that it breaks the temperature regulating abilities of wool, one step closer to your body by being directly under your sheets.

The downside of the wool puddle pad is that over a few years, the fibers do start to pull away from each other in areas of high use and the pad will stretch. Of course, a stretching pad at first is nice, because then it covers the side of the mattress as well as the top. Since the fibers are felted and not woven, if washed, they need to be handwashed gently. Instructions are in the product.

WATERPROOF JERSEY PUDDLE PAD

Organic Waterproof Mattress Protector Puddle Pad

The waterproof jersey puddle pad works through its laminate layer. While it is slightly air permeable, liquids cannot pass through it. The water will bead up and run off. It is very easy to clean, as you can machine wash it. Since the fabric shrinks in the wash, we have prewashed it for you so that it will still fit your mattress after your washing.

The downside of the waterproof jersey pad is its unnatural component of the polyurethane layer. While it is a certified GOTS organic polyurethane, to the natural purists out there, the laminate layer is not natural at all.

Help me Build my Cart

Posted on 1 Comment

QUESTION:

Could you help me build my cart? I would like REALLY firm interior, with only slightly softer on top…then the layers…..of whatever……..a padding etc? or PURE SUPER FIRM in ALL the interior, then the LAYERS of whatever padding on top?? 
with whichever casing……you suggest? perhaps the twill that you use in the video?? or the quilted?? HARD to figure it al out,….ha.ha
COULD YOU SUGGEST A BUILD FOR ME?……..so I can put them all in the cart?
and pillows…………I guess firm and one soft just to be on safe side
inner, outer cases…..all that is confusing
COULD YOU SUGGEST THE BUILD ITEMS TO PUT IN A CART, IF YOU WERE DOING THIS BUILD?
I’M TRYING TO DO THIS, BEING ELECTRICALLY SENSITIVE (gasping at the internet) AND STARING AT THOUSANDS IN A CART…..NOT MAKING GOOD PROGRESS…HA.HA IF YOU COULD WHIP OUT A BUILD, I’D LOVE IT!!!!!!

ANSWER:

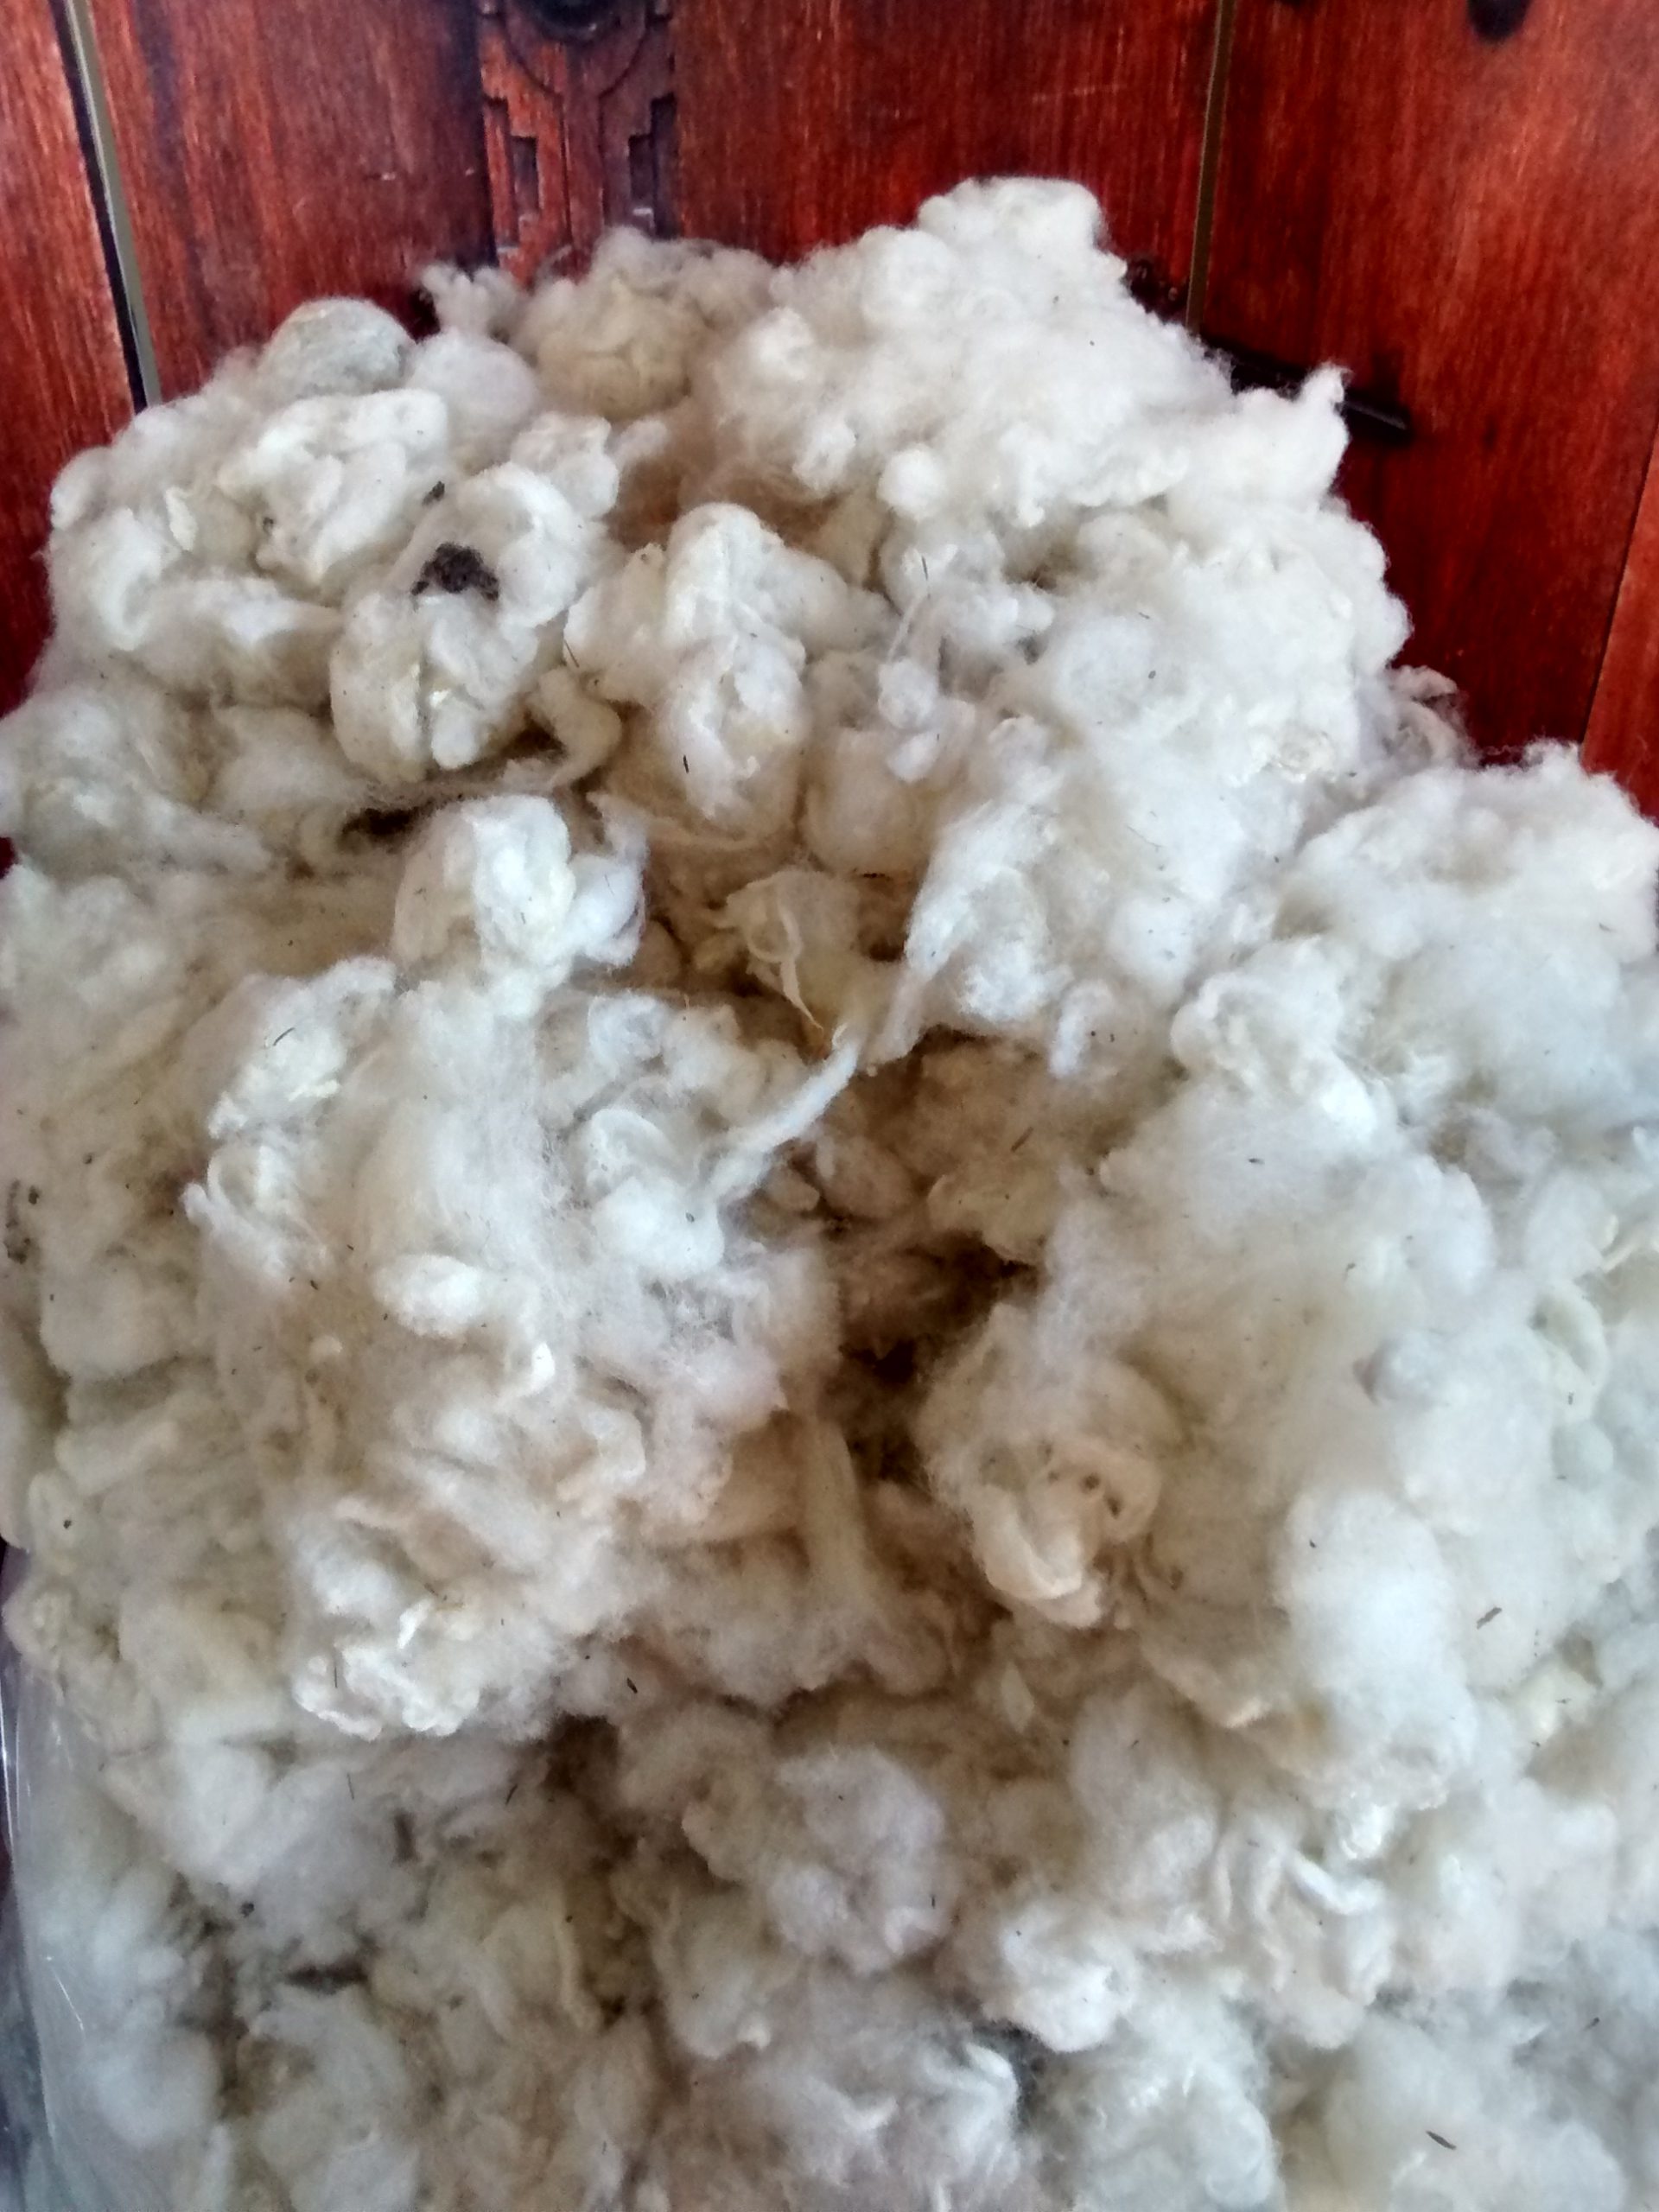
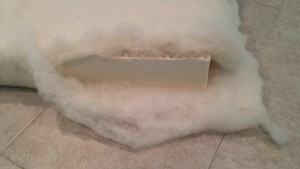
A firm mattress is easily accomplished with either with extra firm or hard latex or wool flake/wool batting like this post and this picture.

A wool puddle pad would be a bit stiff to double as a blanket but it would be a good mattress protector. We do have a lovely wool blanket made from our small farm wool. Naturally our wool topper provides great comfort on top of a mattress and can take a mattress from very firm to firm support with pressure point relief.

Wool pillows and millet hull pillows are both great at being firm. New wool batting starts off soft, but does end up firm as it compresses over a few months. A soft wool pillow simply has less wool than a firm one. It could just easily be called a flat pillow or lighter pillow and the firm one could be a lofty or heavyweight. Either way, you can remove any batting you want from either pillow if it is too big. It is not necessary to use two pillow cases, like our kits offer, but it is convenient to not have to remove your fill from the inner case while you wash the outer case.

While you do get the best value for the 3″ and 6″ layers, you can pick a custom depth here

Wool Toppers Q & A

Posted on Leave a comment

A customer asked: “I’m looking for wool with the following specs to meet flammability standards. Can you tell me if the wool in the wool topper meets these standards?

Consider

One of the most important criteria when selecting wool for a wool topper is its micron count. Too high a count or too coarse a fiber and you have stiff rug wool that is pokey inside the fabric. Too low a count and you have thin, slippery fibers that are fine enough for clothing. Also some breeds of sheep have very straight wool with no crimp in it. You want some crimp in the wool so the wool stays lofty.

Specification 1

High quality organic wool that comes from the back or high on the side of the animal (to minimize contact with the debris the live animal runs across in pasture), and come from a sheep fed an organic diet.

Answer 1

No, we do not separate the wool on the different parts of the sheep’s body. The machines take care of most of the vegetation so it is rare to see any. No, this year’s sheep are not necessarily fed an organic diet. Sheep are grazers and so are pastured all day with green growing grasses that are not harmed with chemicals. These sheep are milk producers and make some amazing cheeses. See Green Dirt Farm‘s page for more info. See also our post on natural vs. organic wool.

Specification 2

The natural lanolin and keratin in the wool must remain intact. This means washing must be minimized, and chemical washing (which can strip lanolin, especially), is right out.

Answer 2

To keep all of the lanolin means to keep all of the dirt and grime. To remove all of the lanolin means the wool must be sacrificed in order to harvest the lanolin. Naturally, the wool is washed. The only substance used in its processing is a surfactant, which breaks the surface tension of the water, allowing the oily lanolin to float away in the washing water. Unlike conventional wool, our wool processing contains none of the following chemicals:

  • NO bleach
  • NO acid bath
  • NO bonding
  • NO resin
  • NO carbonization
  • NO superwashing

Specification 3

High natural lanolin content combined with careful processing that makes wool an effective FR barrier. 

Answer 3

Wool is also an effective fire barrier when it is dense and matted. Reducing oxygen that a fire needs is part of its job too.

Specification 4

Wool that is carded or garneted and then “densified” by needle punching or quilting minimizes the air between the fibers while retaining comfortable loft. 

Answer 4

No, the wool in the topper is not felted or needle punched, our wool puddle pad is though. That would make a firm mat and not a lofty topper. It is also not quilted or it would be a ticking, not a topper. It is tufted. All batting is either garneted or carded, that is the process of laying fiber on top of each other to create a fluffy sheet.

Specification 5

Wool in a thickness of about 1.8 oz. per square foot, properly prepared, makes a highly trustworthy FR option.

Answer 5

True enough, that is the industry standard because it does pass the burn test. Wool also passes the burn test due to its high combustion point, 600 degrees, almost triple that of cotton’s burn point. If you want a fire barrier, you should be looking at our Quilted Ticking, then the wool wraps entirely around the mattress instead of just on top like a topper.

Free Tutorials

Posted on Leave a comment

First of all, we are all healthy and well here, so we are still running shop.

Second of all, thank you to all of you for your well wishes during this time of making history. You guys are so thoughtful and genuine. We wish you all much health and chances to relax into a new pace and and space to enjoy those near and close to you.

Most importantly, I’ve been pondering how DIY Natural Bedding can lighten the load of the season and offer something of value and I think I have an answer! I would like to share our creativity and let you make it yours!

I don’t know about you but I find that creativity doesn’t necessarily mean coming up with a brand new idea. For me, it may mean combining ideas or items into something personal. And these days with time to productively fill, we need to find ways to keep our hands busy, our bodies grounded and our hearts engaged. What better way than to work with natural components, creating something useful for your bed?!

I offer you all of our tutorials for FREE through May 15. This means that all the kits that provide the tutorial as your sewing instructions are discounted as well. They can all be found in their own section of DIY Tutorials and Kits or you can click on the links below.

All of the tutorials are downloadable PDFs with pictures, dimensions and step by step instructions.
All of the Kits include the tutorial plus supplies to make the item with.
Supplies without tutorials are available in the DIY Supplies section of the shop.

TUTORIALSKITS
Wool Topper Wool Topper
Millet Hull Weighted Blanket Millet Hull Weighted Blanket
Knit Ticking Knit Ticking
Expandable Knit Ticking Expandable Knit Ticking

If you create a project with our supplies and post to social media, please tag us! We would love to see your creation!

DIY Mattress: Common Combinations

Posted on 2 Comments

While DIY combinations for your mattress are almost limitless, there are a few configurations of our products that are commonly combined. The pillows are deliberately matched with each combo to match the softness or firmness of the mattress. Here are some of common combinations:

FOR ADULTS:

(Soft Combo – generally for adults under 250 lbs.)

(Average Combo – generally for adults under 180 lbs.)

(Firm Combo – the most natural option, compares to an Extra Firm option without the topper, Firm with the topper)

(Extra Extra Firm Option – for those who like sleeping on the floor but want some cushion)

FOR CHILDREN:

(Starter Option that saves on the budget now and leaves room to grow later)

New Relationship with The Mattress Underground

Posted on Leave a comment

Almost eight years ago I started DIY Natural Bedding. We started off from scratch, no loans, no building, one 6″ slab of latex, and big ideas, so small that a Craigslist listing and the members of our Minneapolis Weston A. Price chapter accounted for the entire 22 sales made that year.  Somewhere that year, while working night and night on the website, I put the business on Facebook. Imagine my surprise when Onno (RIP) from The Mattress Underground called me, alerted me to his forum and affirmed my path into conscious and quality bedding supplies.

Throughout the years I have visited The Mattress Underground’s forum many times; sometimes to help answer questions and put in a good word for wool and latex, sometimes to get questions about other supplier’s products answered. All the times I visit, I am reminded of our shared goals: to provide education, to provide answers, to help, to show transparency, and to work with quality materials. I have found their interactions to be very positive and engaging and share a similar approach. You know I value a personal mattress shopping experience when I open up a room in my home to welcome you to and our Minneapolis showroom does the same. When you call or email, I have trained my crew to ask questions, to try to help you see options that might fit your goals, to provide extra information when it would be helpful, even you didn’t know to ask for it. Giving you a personal, positive and engaging research experience is important to me. Do let me know if you ever need more answers than we have given and we’ll do our best to point you in the right direction.

Because of these shared goals, I have decided to partner officially with The Mattress Underground. That means little to your experience on our site or really on their site if you bounce over there to broaden your search. It does mean a benefit for you though, but you’d have to check out our profile there to find out that benefit. 🙂

The Mattress Underground

Here is what The Mattress Underground says about DIY Natural Bedding:

“Thank you once again for your interest in becoming The Mattress Underground’s (TMU) trusted member, and particularly for your time, warmness, and for addressing all our questions. I have enjoyed our conversation, your honesty and what you stand for. We believe that DIY Natural Bedding (DIYNB) and TMU share similar values, ideals, and goals and we are very pleased and excited to welcome DIYNB in TMU community as one of TMU’s Trusted Members.

“Over an extended period we have reviewed and assessed the products that DIY Natural Bedding (DIYNB) provides and manufactures in terms of value/quality, and craftsmanship, we have determined that they meet the quality and durability guidelines here. We also believe that the information available on your website is accurate and factual and designed to help consumers make an informed purchasing decision, and that DIYNB provides excellent customer support.

A warm welcome to The Mattress Underground!”

How full do you want your pillow?

Posted on Leave a comment

Adjustable Pillow Kits

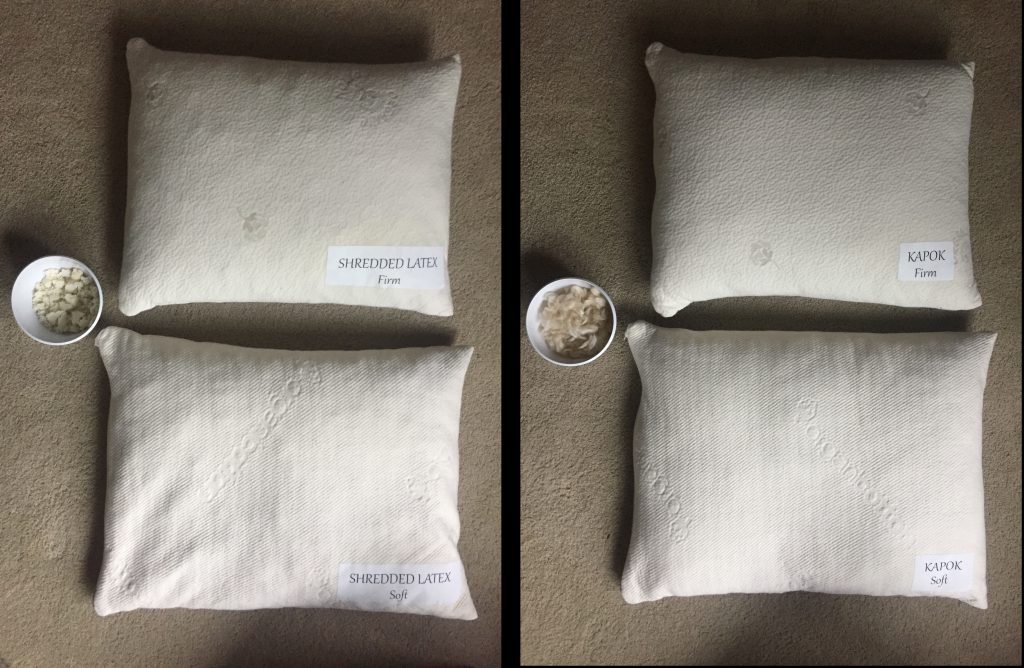
While all our pillow cases have zippers so that you can adjust the fill amount, sometimes it is hard to know what feel you like when you lie on a pillow that is too tall or too flat for your liking. Because pillows make all the difference in knowing what firmness of mattress is comfortable, our showrooms now have two firmness of each pillow for you to try out. Of course you can add and remove fill still, but to be honest, that gets a little messy, so we did it for you.

Both pillows pictured feel very different underfilled or over filled. An under filled a kapok pillow feels like a feather pillow, fluffy and very pliable; an underfilled shredded latex also has been liked to a feather pillow because the fill is pliable, but instead of soft fluff, imagine a slight bounce. With both shredded latex and kapok an over filled pillow holds it shape well and can be firm, though again, the bounce of latex is unmistakable and the firmness of well-packed kapok becomes prominent.

Wishing you all the perfect pillow.

Woolly Bolas vs. Kapok

Posted on Leave a comment

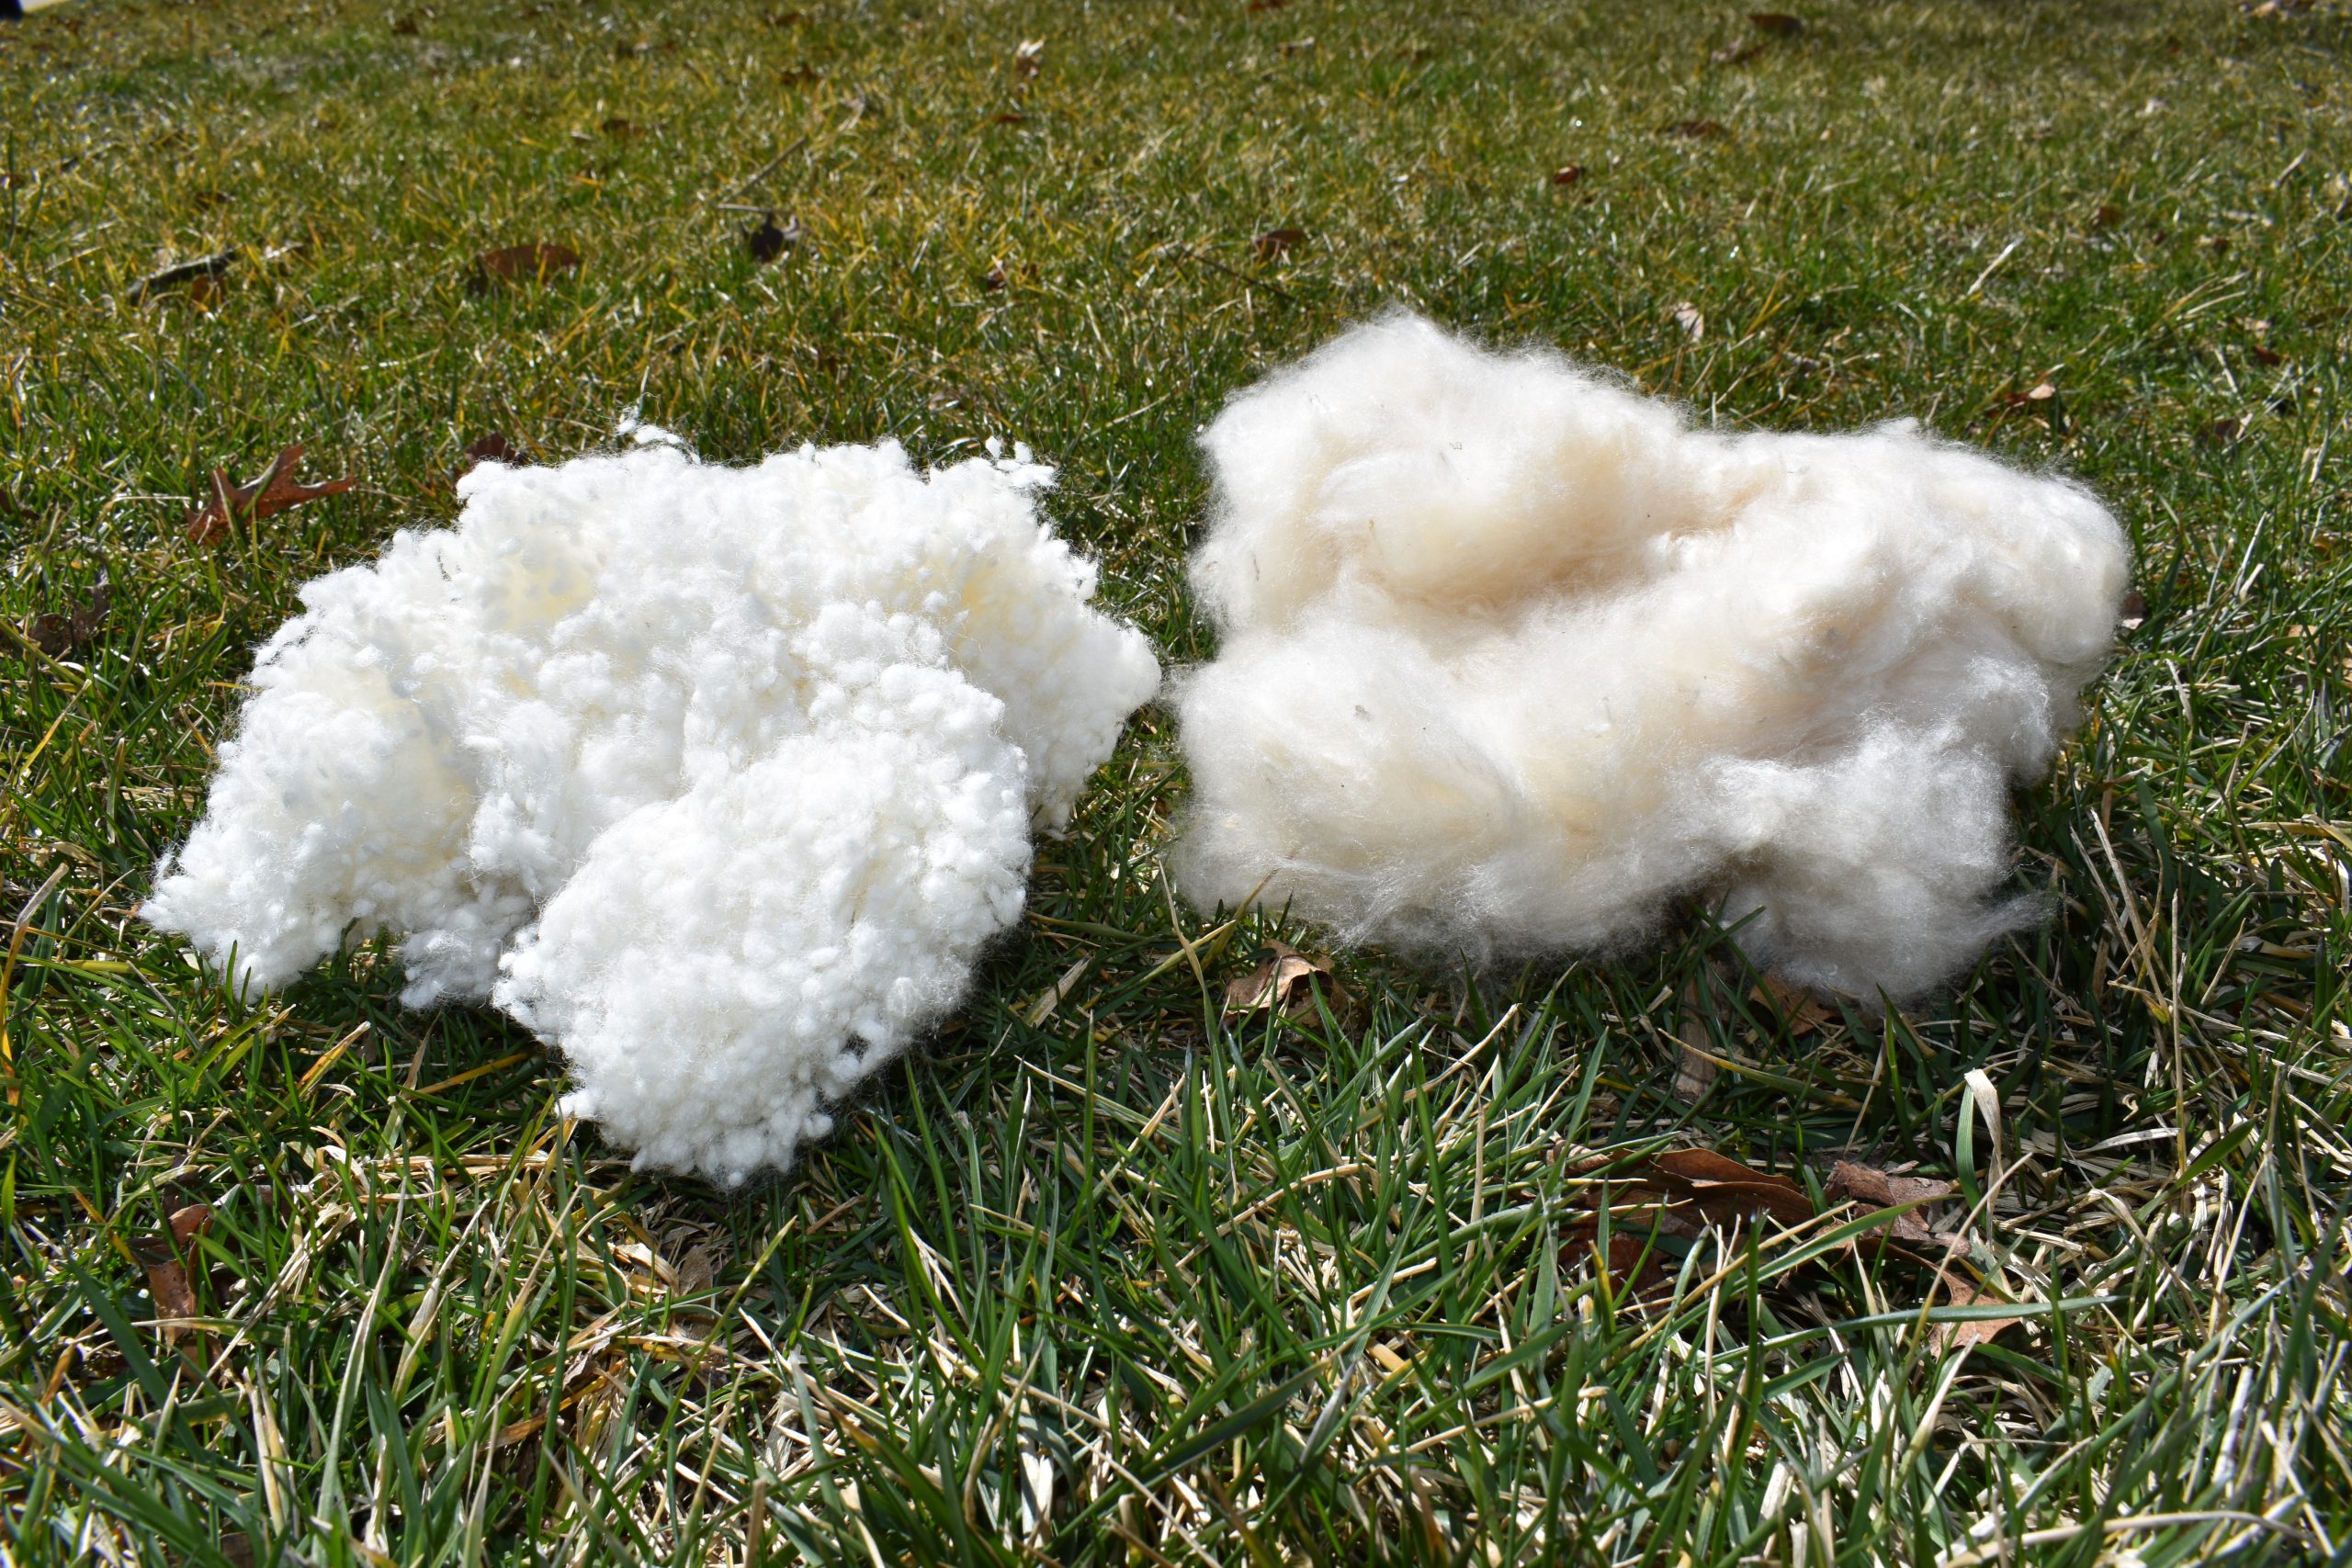
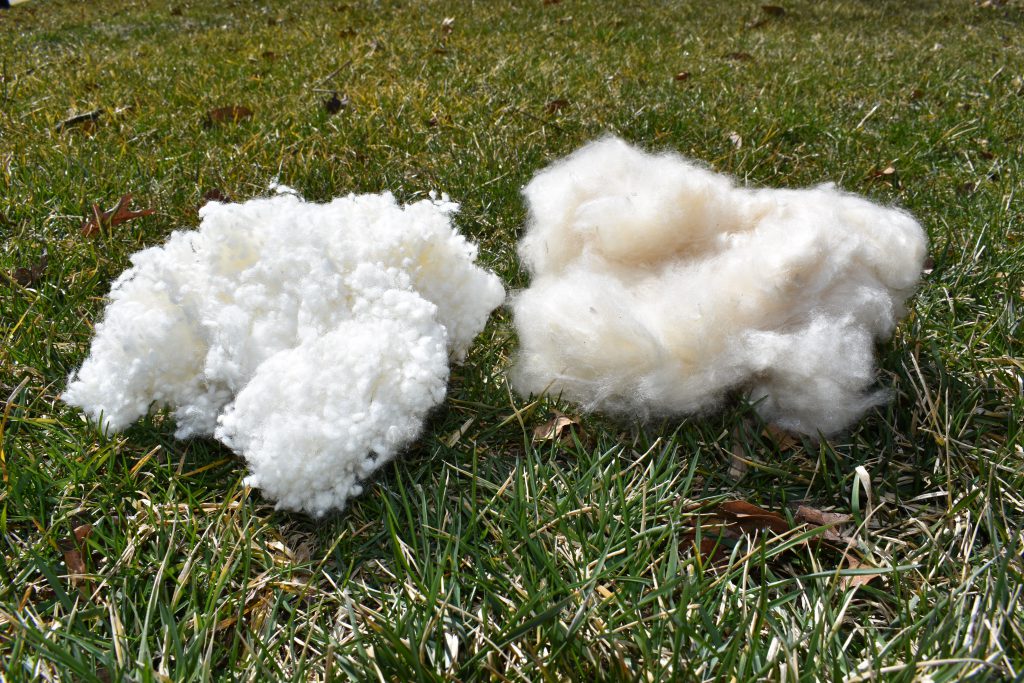
Our two lightest and fluffiest pillow fills, side by side. But which do you choose?  Kapok (on the right) is a plant fiber and woolly bolas (on the left) is an animal product. Kapok carries the most fluffing ability, comparable to a feather pillow if you understuff the kapok. Its light, airy fiber will certainly be a float away fiber but does lose its loft as it is slept on. The bolas are the more cloud like fill. If fluffed every night, they maintain a springy feel that doesn’t deflate as slept on. Both fibers overstuff well, kapok producing a solid, firm pillow and bolas, a springy, firm feel.

Pregnancy, Sleep and Latex Mattresses

Posted on Leave a comment

Birth and pregnancy are beautiful, empowering moments in a woman’s life and can be complemented by knowledge and a few tricks.  This is my personal experience with bedding and pregnancy; perhaps it may be similar to yours.

My fourth pregnancy was fairly simple as mine usually are: at the beginning there was an extra tiredness, a need to sit down frequently, and a wondering if I was really pregnant; in the middle, I was loving the big belly, finding new pressure points, going on frequent walks to relieve sore joints; and at the end, there was the hefting around a giant, heavy belly and noticing different pressure points again and remembering that I actually do have abdominal muscles though I can’t feel them.

The first three months, nothing changed between me and my latex mattress. We still enjoyed each other’s company, I slept well. My medium over a firm with quilted ticking was serving me well until about month four when I noticed I started waking up more frequently during the night. Then I went on vacation and stayed in a college dormitory with a cheap, cheap, cheap spring mattress. I had a complete inability to keep from rolling toward the middle; the amount of abdominal work it took to stay on my side of the mattress made what was left of my abs sore the next day, my belly was either way too low if I faced the center of the bed and way too high so that either way, I kept falling toward the saggy center. If that wasn’t enough, being used to a nice comfort layer of my own mattress, my hips could not handle the tension of the springs and forced me to take the cheap memory foam cushions from the couch to use as a floor mattress. When I got home from that trip, I realized that my hips had slowly been protesting all along and I had to do something. I stole my husband’s soft layer of layer and lay it on top of mine. That was it. I needed that. So I ordered a new slab for me and didn’t love its squishiness but loved being able to sleep mostly through the night. The layer was super squishy since I merely covered it with a sheet under my sheet and didn’t put it in a new bit of ticking, just on top of the original arrangement of medium over firm in their ticking. Interestingly enough, when I switched to the softer layer, since my head was higher on the mattress than comparatively to the firmer combination, I needed to take some fill out of  both of my pillows. Then I had the perfect sleeping solution again.

Come month six, I was waking up a few times a night but had resigned myself to this as I remembered from other pregnancies that waking up is a bit unavoidable when you have to find new positions to sleep in. What I was unwilling to resign myself to was the deep ache that started to come from my left sacralilliac joint. I knew my pelvis would start expanding eventually and that baby’s head was tucked down on that side anyway, but the mere act of lying down would drive tears into my eyes and was something to be reckoned with. The only thing that would help was walking, so I would often walk around my culdesac for  a half hour before I could go to sleep and often took my husband on mile long walks which actually did completely loosen up that joint and gave me temporary relief that even the chiropractor, who I had been seeing regularly, couldn’t provide. While these long walks were amazing at letting me fall asleep again without pain, it wasn’t until I asked myself what the right side of my hips were doing to cause my left side such discomfort that I realized that my sitting position while I was driving was the cause of it all. I had started driving my children to a school 45 minutes away, so needless to say, I was putting in a lot of drive hours. Once I scooted the chair forward and made sure that I didn’t twist my body to let my right foot reach the gas pedal, the pain went away that week. Phew! Back to decent sleep and no pain.

Month eight was way past my joking about how hard it was to roll over in bed from side to side and figuring I was carrying the weight of a couple bowling balls around, all in my belly. No, month eight was countdown time. Now I love so many parts about being pregnant, the amazing craziness of my body knowing how to grow a baby without my mental intervention, the intimate connection I get to share with another human being, the chance to participate in life, the change in social expectations, even the chance to look completely different from normal, but I will say that to get my own body back is always quite welcome. Once my new pressure points on my hips kept me up for an hour in the middle of the night, I knew I had to do something about them. I started with the mattress. Should I make it softer, try a different sleeping position, use a pillow between my knees? The pillow in between my knees seemed to make the pain worse, so I ditched that.  I tried sleeping slightly on my back, propped up with a blanket folded behind me and tiny pillow under my belly so that it wasn’t hanging in midair, but that was only variety and not terribly comfortable. Giving my husband back his soft layer and going back to my 6″ combo of medium over firm surprisingly did make a little difference and I slept a little better, but it was not until I added a medium layer to my medium over firm that sleep came much more easily. I found the latex cradled my belly and supported it well, well enough that if I rolled into it too far, I would give baby hiccups, which he had been getting for months when I would sit cross legged or at a 90 degree angle when driving. Because we needed a new ticking made for the 9″ version of the mattress now (my husband’s side had been 9″ for a while but the top layer had been sitting on top of the ticking, wrapped in a couple of sheets), I had my sewing room make a Knit Ticking instead of the Quilted Ticking we previously had. The flexibility of that ticking was noticeably different and with my growing pressure points, I thoroughly appreciated latex’s ability to sink in underneath me instead of stiffly supporting my body. Despite ache free sleeping, I had started waking every few hours to roll over and trying not to wake my husband with my huffs of exertion as I did so.  When I woke up one morning with a slight pain on the right side of my belly where the baby’s back was, I ignored it until the next day when it started spreading down my side. Bother. This was an easy ache for me to solve and I should have been on top of it months ago, but I’ll admit, I got lazy. I had been hefting around that belly of mine through the nightly turning, just letting my skin and bones support it. I knew I should be tightening my abdominal muscles around it every time I rolled over and doing so took care of that ache quickly. Another month of ache free sleeping was on its way.

Month nine came with yet a different hip pain, this one I just couldn’t figure out after all my previous adjustments to my sleeping positions, mattress and supplements. By now my legs had stopped cramping when I slept, but my right hip was just sore as soon as I would lie down. Finally I realized that this bed ache was my fault. I had been accustomed to sleeping on my side with my upper hand on my hip so that I wouldn’t put that hand in an awkward position and it would fall asleep. Once I let that hand rest on my belly and transitioned to sleeping on my right side more, the ache alleviated. Sleep was still pretty good. About three nights before baby came, I knew he had to be coming soon as it started taking me half hour to fall asleep after rolling over. Labor began for me in the middle of the night, a first as it usually began in the early evening. I was so grateful that I got to run the marathon with some sleep under my belt.

After writing this post, I’m rather surprised how intimately my mattress and sleep were part of this pregnancy. Maybe it is in part because I am one of those people who have always needed a lot of sleep, so I do make it a priority; maybe it has to do with relaxing and how much better one can feel the body when you taken the time to go inward, which is easy once you lie down and the day is over; or maybe I just enjoy having a body in good working condition and all my adjustments did enable that comfortable condition. Whatever the reason, I am grateful for options and the chance to tweak my mattress. DIY all the way!

If you have had aches and pains during pregnancy during your sleep that you have successfully fixed, please share in the comments below. How have you tweaked your mattress, your sleeping positions, your health to let you get a better night’s sleep?

Child Mattress Q & A

Posted on Leave a comment

Q. We have a 4 1/2 month old who is growing out of his co-sleeper and we want to make him a mattress he can use for several years. What do you think is the best route for an affordable baby mattress? What is the most common build?

A. There are many ways to make a mattress. Here are a few ideas that have been made with our products. This first one is the most common, the other two more creative.

  1. A 3″ medium of natural latex inside an expandable ticking would save room for another layer later, wool batting is optional. This is the build in my youtube video here.
  2. A full sized wool topper folded in half would be somewhat thin, but sufficient for a few years, if you don’t mind a somewhat permanent crease in the middle when you unfold it to put on a mattress. It would also be a nice addition to a 3″ piece of latex later.
  3. Two mattresses out of one piece of latex: Cut a crib mattress out of a Twin piece of latex and save the larger L shape of the latex for later when your child needs the larger space. Then you can put both pieces together in the same ticking. This can also be done with a Full sized piece of latex. Two cribs will fit into a Full.
Q. In the most common build of 3″ latex & expandable ticking, is there a reason you chose that particular ticking as opposed to the other options, two of which are less expensive?

A. I mentioned the expandable ticking because it is a common choice with budgeting parents who know that their child will be comfortable on 3″ of latex until they near 100 lbs. They often want to buy a second layer later when they have time to save for it. As latex is said to last 20-30 years, that first layer of latex will still be fresh to use in the mattress when it is turned into a 6″ mattress.  Then that first layer can either be placed on top of or under another layer to create a new feel. See The Banana Test for more thorough tips on picking depth and firmness.

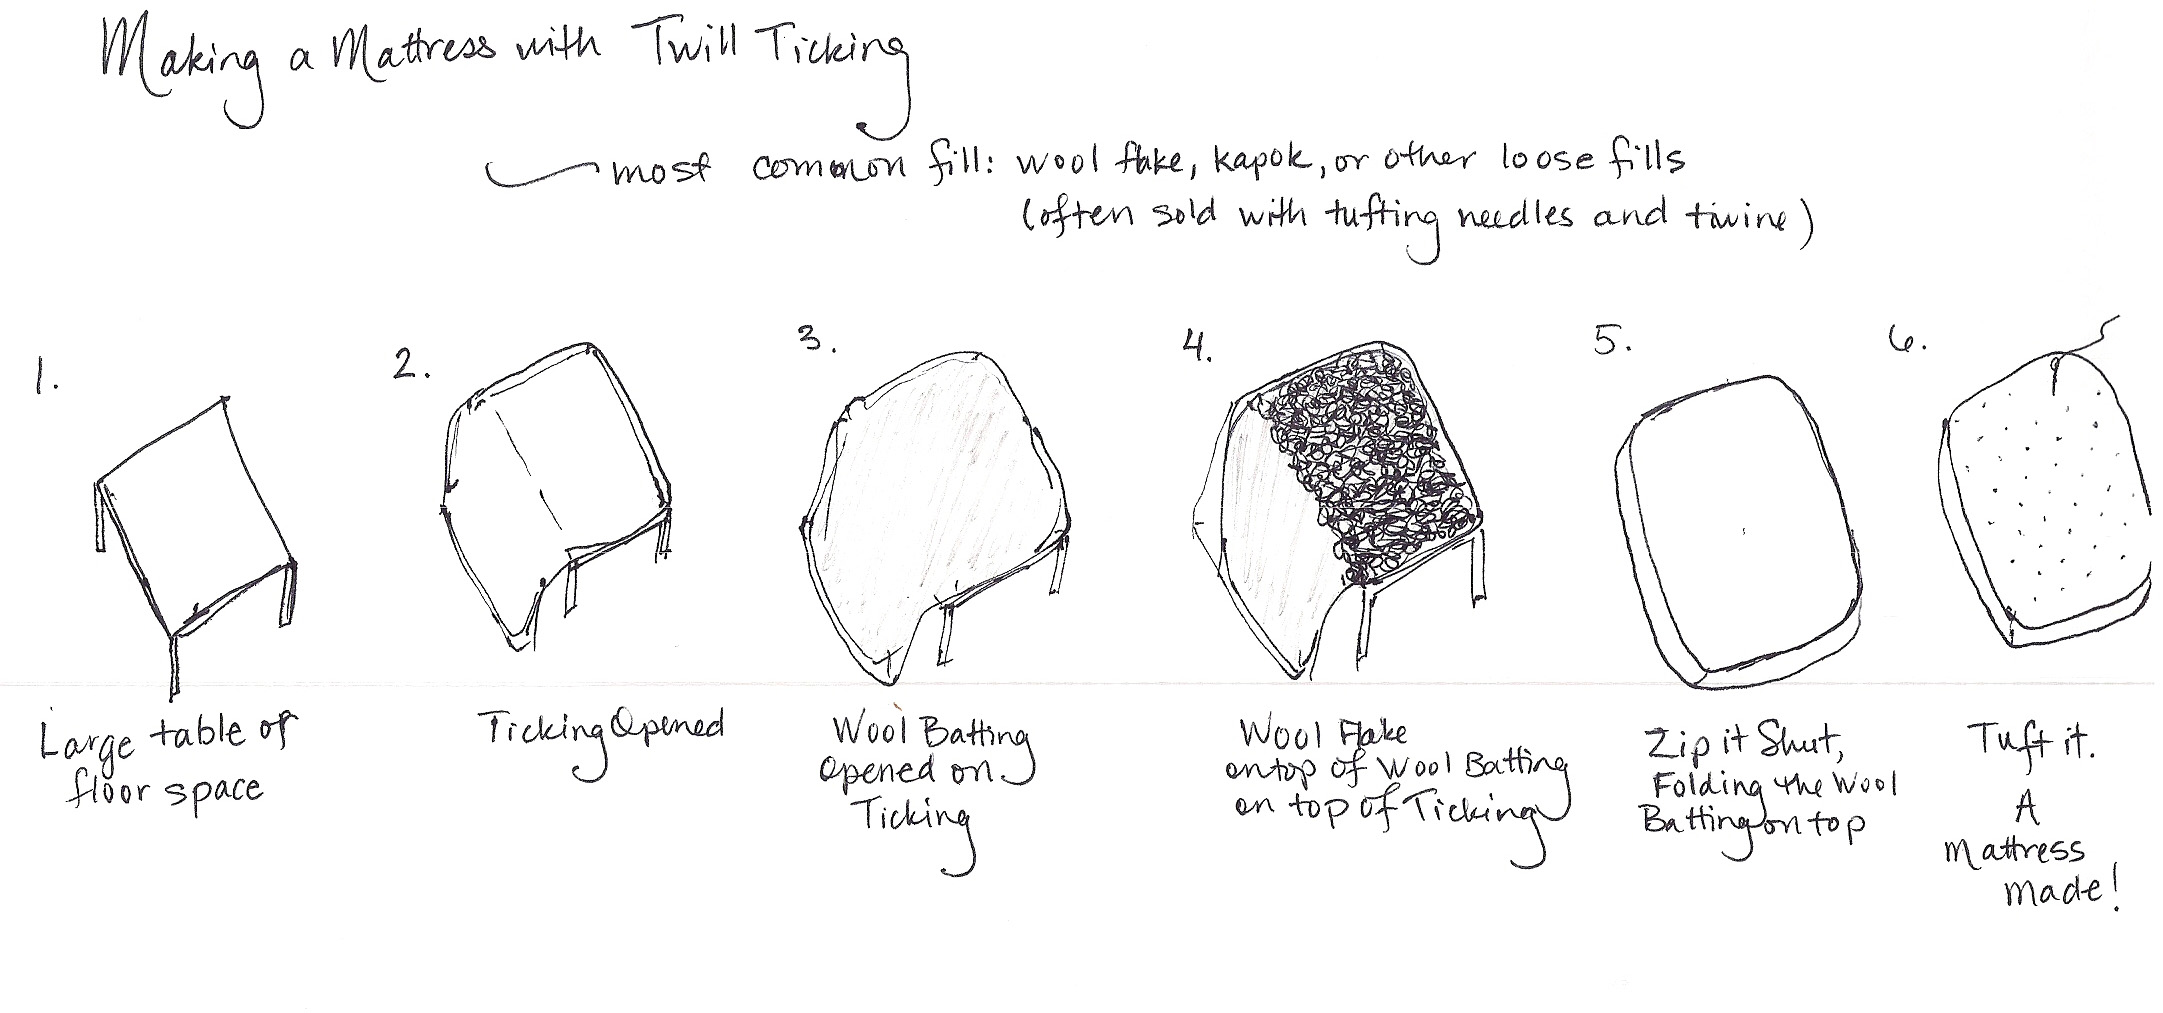
The Twill Ticking is also an option, in fact, all 3 of my children have it on their mattresses.  It is durable and simple.  Its stiffness makes it strong enough for the tufting needle to pierce without snagging it which is why we recommend it for use with our wool flake when making a wool mattress.

The Knit Ticking is also an option. It is made of the same material that the Expandable Knit is, so both cases are quite flexible, letting the sleeper feel the latex or wool underneath completely.  It being a static height usually is cause to choose a 6″ combo of latex that will last the child into adulthood.

The Zip Off Wool Ticking is also an option.  Its best features are, of course, the removable wool puddle pad on the top of the ticking. It works well for parents who want a wool puddle pad, but don’t want to buy both ticking and puddle pad.

The sateen fabric covering the wool batting on our topper is very soft and smooth. It is nice to have a thin layer of fabric between you and the wool. Wool batting has its limitations, while lofty and quite fluffy, you should be aware that more that 3 layers of wool on top of each other may not only shift around easily (thus the tufting on the toppers) but also may easily form body trenches, unless your child is very active on every surface of the mattress. Keeping in mind that every layer of 3 lb. batting compresses to about 1/2″ and a layer of 4 lb. batting to about 3/4″, you have a fairly thin mattress with only 3 layers. That is why I mentioned folding a topper in half, the fabric layers and probably the frequent straightening of the fold should help the top to compress fairly easily. Of course, you could make your own topper with our kits here.

Q. Would it be cheaper to fill it only with wool batting?

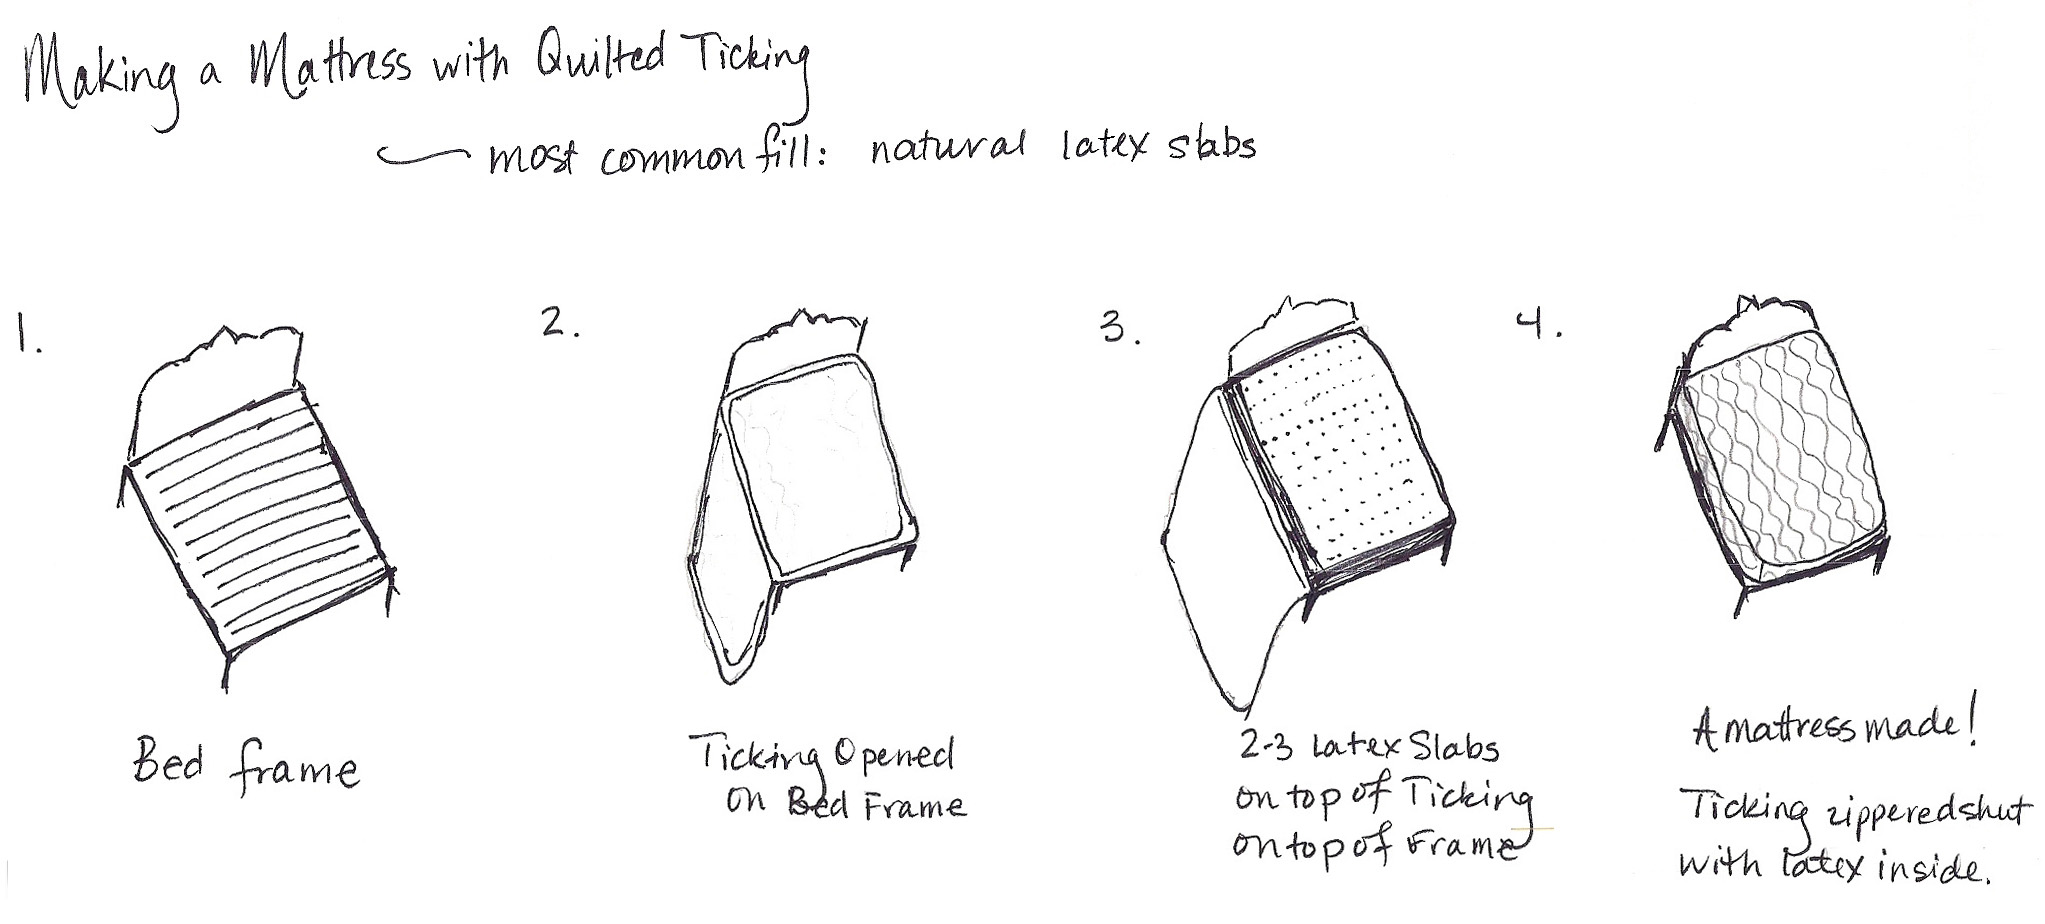
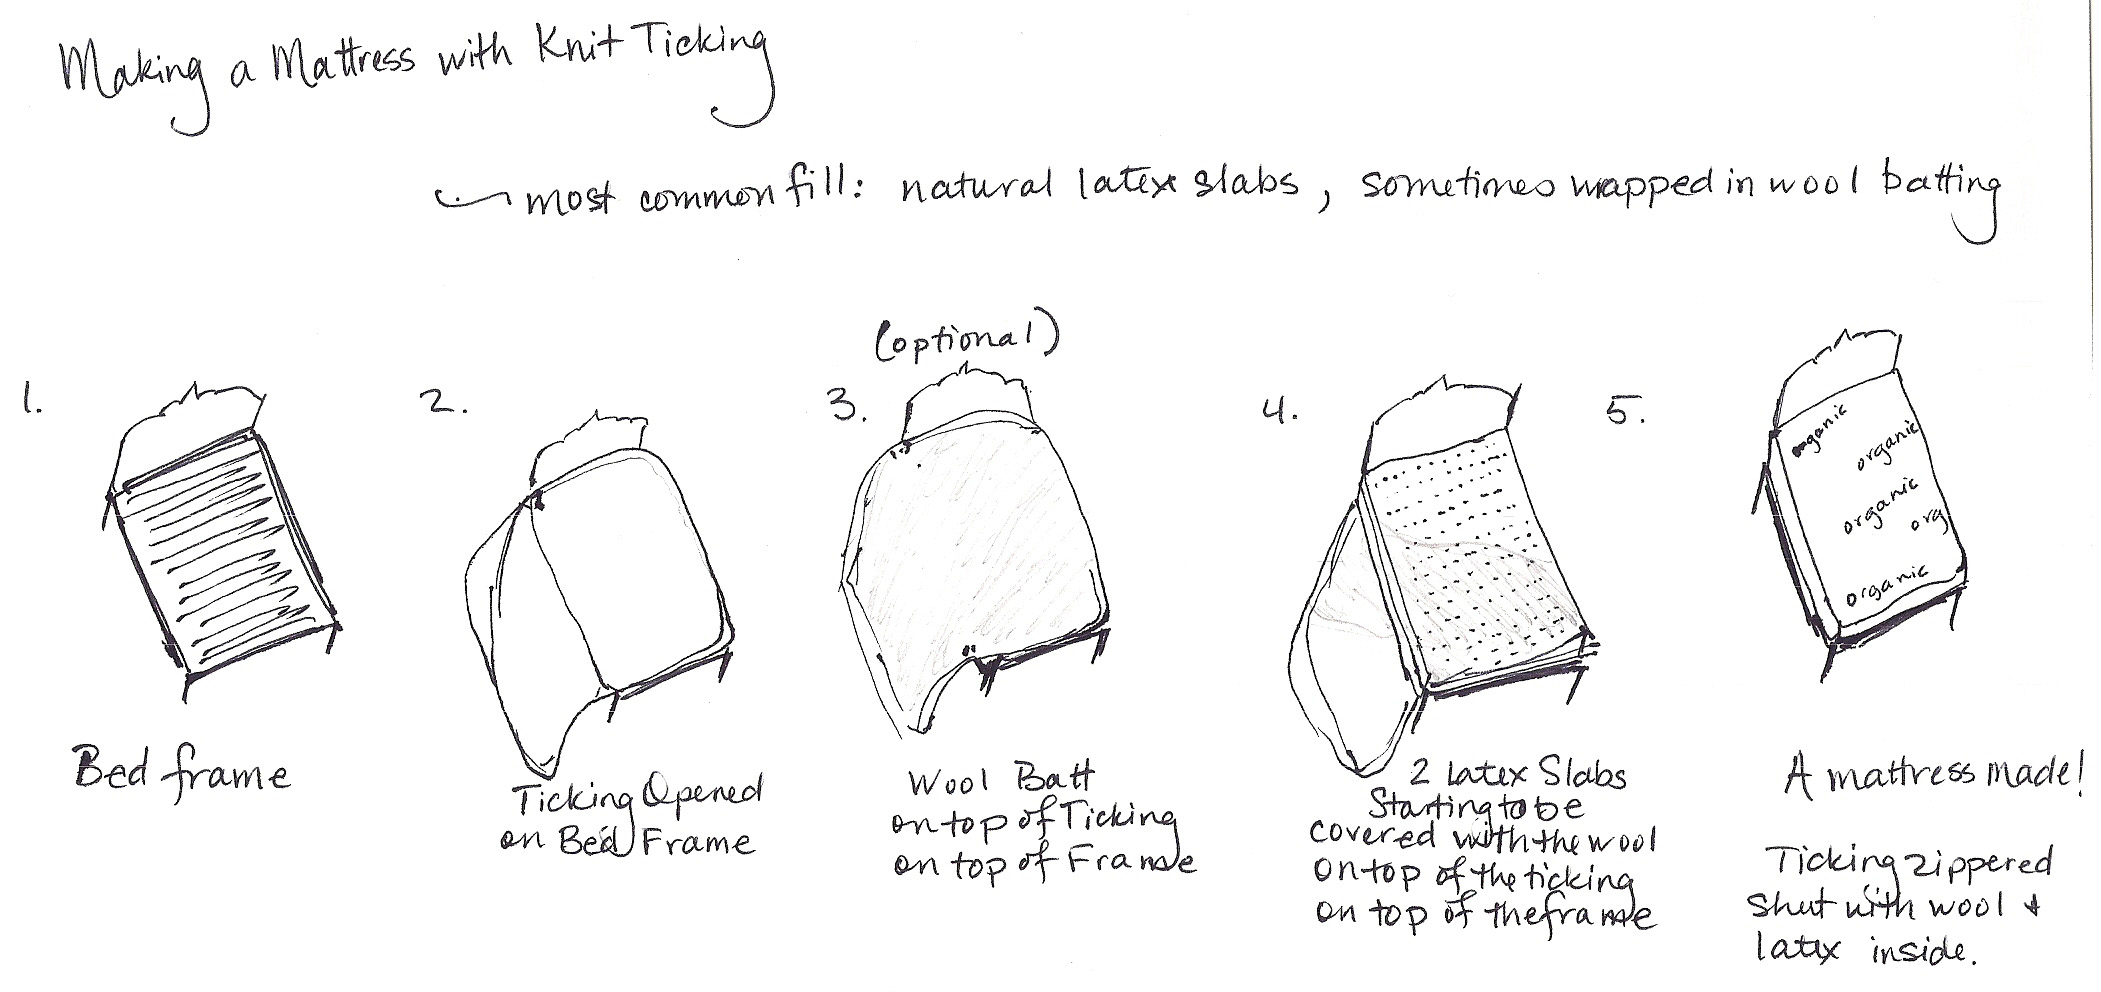
A. No and it is not advisable to make a mattress out of just wool batting, a topper, yes, but a thick mattress without wool flake and just batting will trench too easily and leave you with body impressions. For instructions on making a wool mattress, see this picture tutorial or this diagram. Wool batting is a nice addition for comfort or protection of the latex. See previous paragraph.

Q. Thank you so much for your very detailed response! I am planning to rest the medium density latex on a just wood slats which would be say 1 – 2″ above the floor. Based on the Kg/m3 metric and your rule of thumb #3, I think I (150 lbs) would feel the slats if I sit on the 3″ latex to read him a book. Then,
  1. Could adding the wool batting on a medium 3″ alleviate the issue somewhat?
  2. Would something like this work:  A 3″ firm latex instead but with wool batting. Could this configuration make it sufficiently supportive for an adult to sit on for a short time and somewhat soft and abundantly supportive at the same time for a child to lie down?

A. I find that reading books for 15-30 minutes on my children’s mattress is not cushy comfortable, but it is certainly tolerable. Adding the wool batting will deepen the mattress which will provide slightly more comfort. Substituting the firm layer would probably be a good idea if you plan on making reading or sleeping on the bed a habit. Unless your child is a sensitive sleeper, he or she will probably mostly notice the wool and only slightly notice the firm latex.

Bed Frames: Latex and Wool Mattresses

Posted on 1 Comment

NOTE: Wool toppers are not discussed here, only depths thick enough and solid enough to be a mattress.

Q. Can you use a power base (or adjustable bed frame) with the latex? Will it harm the latex?

A. Yes, you can use a power base with latex. Latex is a very flexible foam, so it will not mind constant bending. However, it is worth noting, that when one is sitting up, one puts a lot more pressure and use on the surface then one does when lying down. That top layer of latex will wear out sooner than the other layers. Of course, that is the nice thing about a layered latex mattress. When one piece wears out, you can simply replace the one piece instead of the entire mattress.

Q. We may be interested in possibly putting the mattress on the floor for a Montessori bed.

A. If you do, especially if your house is not climate controlled, make sure to air out your latex or wool mattress frequently, maybe only seasonally if you have air conditioning. If you can’t flip the entire mattress over to let any accumulated body moisture evaporate, flip half of it up for a day and the other half of it down the next day. While latex and wool are both natural antimicrobial and I have never had any customers with any issues, common sense says that heat and bacteria mingled for long enough in the right conditions could lead to mold.

Q. I am hesitant to use my box spring as I know they are generally treated with flame retardants but I don’t want to loose the height it provides. Do you have another suggestion?

A. The most common supporting systems are slats as they let the latex be a little more flexible than a flat surface like a board or the floor. Some make their own slats of 1” x 4”s, stable them to a ribbon and tie them down to the top and bottom of their metal frame or nail them to their wood frame. Slats are usually spaced 3″-5″ apart, much farther and the latex will sag through them.

A foundation is a strip of slats on top of usually an 8” wooden frame. Sometimes the foundation will come covered in fabric which you may want to check for flame retardants. Your current box spring may be slats instead of springs which can be reused keeping in mind the slat distance and the need for letting the latex breathe occasionally. I have had customers upcycle pallets as ready made foundations. The foundation is where you will get your height.

How to Tuft a Wool Mattress or Topper

Posted on Leave a comment

Tufting is a simple and useful addition to your wool mattress or topper or comforter.  The tufts help keep the wool from shifting inside the ticking and help you control the firmness of your mattress.  The technique is no more than down and up and a double knot.  The above slide show should help clarify.

CLARIFICATION

This technique is not necessary when wrapping a sheet or two of wool batting around natural latex. The latex will grip the wool all on its own. It is great for loose fibers that would want to shift inside their cases, such as wool flake, kapok fiber, shredded latex, and wool batting.

TO CONSIDER
  1. Allow 12″ of twine per tuft as having enough of a tail is essential to easy needling. Do not snip twine to 12″ lengths before tufting, leave the string long.
  2. Distance your tufts 12″ apart for a wool comforter or topper and 6″ apart for a wool mattress.  The thick depth of mattress can create drastic valleys when tufted.  To avoid the valleys, keeps your tufts relatively close together and follow Consideration #3.
  3. Keep in mind that the tighter you pull the knots, the deeper a valley and the firmer a mattress you are making.  With a wool mattress, deep valleys mean that you will need to smooth it over with a wool topper. Alternatively, if you tufts are only 50% tight, the hills and valleys will be moderate and generally tolerable.
  4. If tufting a large mattress, such as a King or Queen, consider putting it on top of 1 x 4’s supported by saw horses so that you can crawl underneath to grab your needle and send it back up. Otherwise you will be constantly lifting 50 lbs+ of mattress every tuft you make.
  5. It is important to make sure all your wool is evenly spaced out. If you find that it is not evenly flat after tufting, unzip the ticking and either using your hand or a grabber like those trash picker uppers, grab wool flake from spots where it shouldn’t be and move it to a new spot.
TO PURCHASE

Our toppers and comforters have been machine tufted with circular stitches, so this technique will not be evident on them.

Zipper Pull Pocket

Posted on Leave a comment


Zipper Pull Pocket

Now on all of our pillow cases, we are hiding the zipper pull or the slider inside its own pocket. There is now no remote chance of the zipper coming open on its own. The jingle of the pull will not waken you in the middle of the night as you roll over and rustle your pillow. Sleep in silence and peace, knowing the zipper pull is secure.

Clearance Latex Items

Posted on Leave a comment

We love being able to offer you our product at discount prices.  After a recent inventory of the “fall off” pieces of custom cut latex, we have a wonderful collection of clearance latex to offer you.

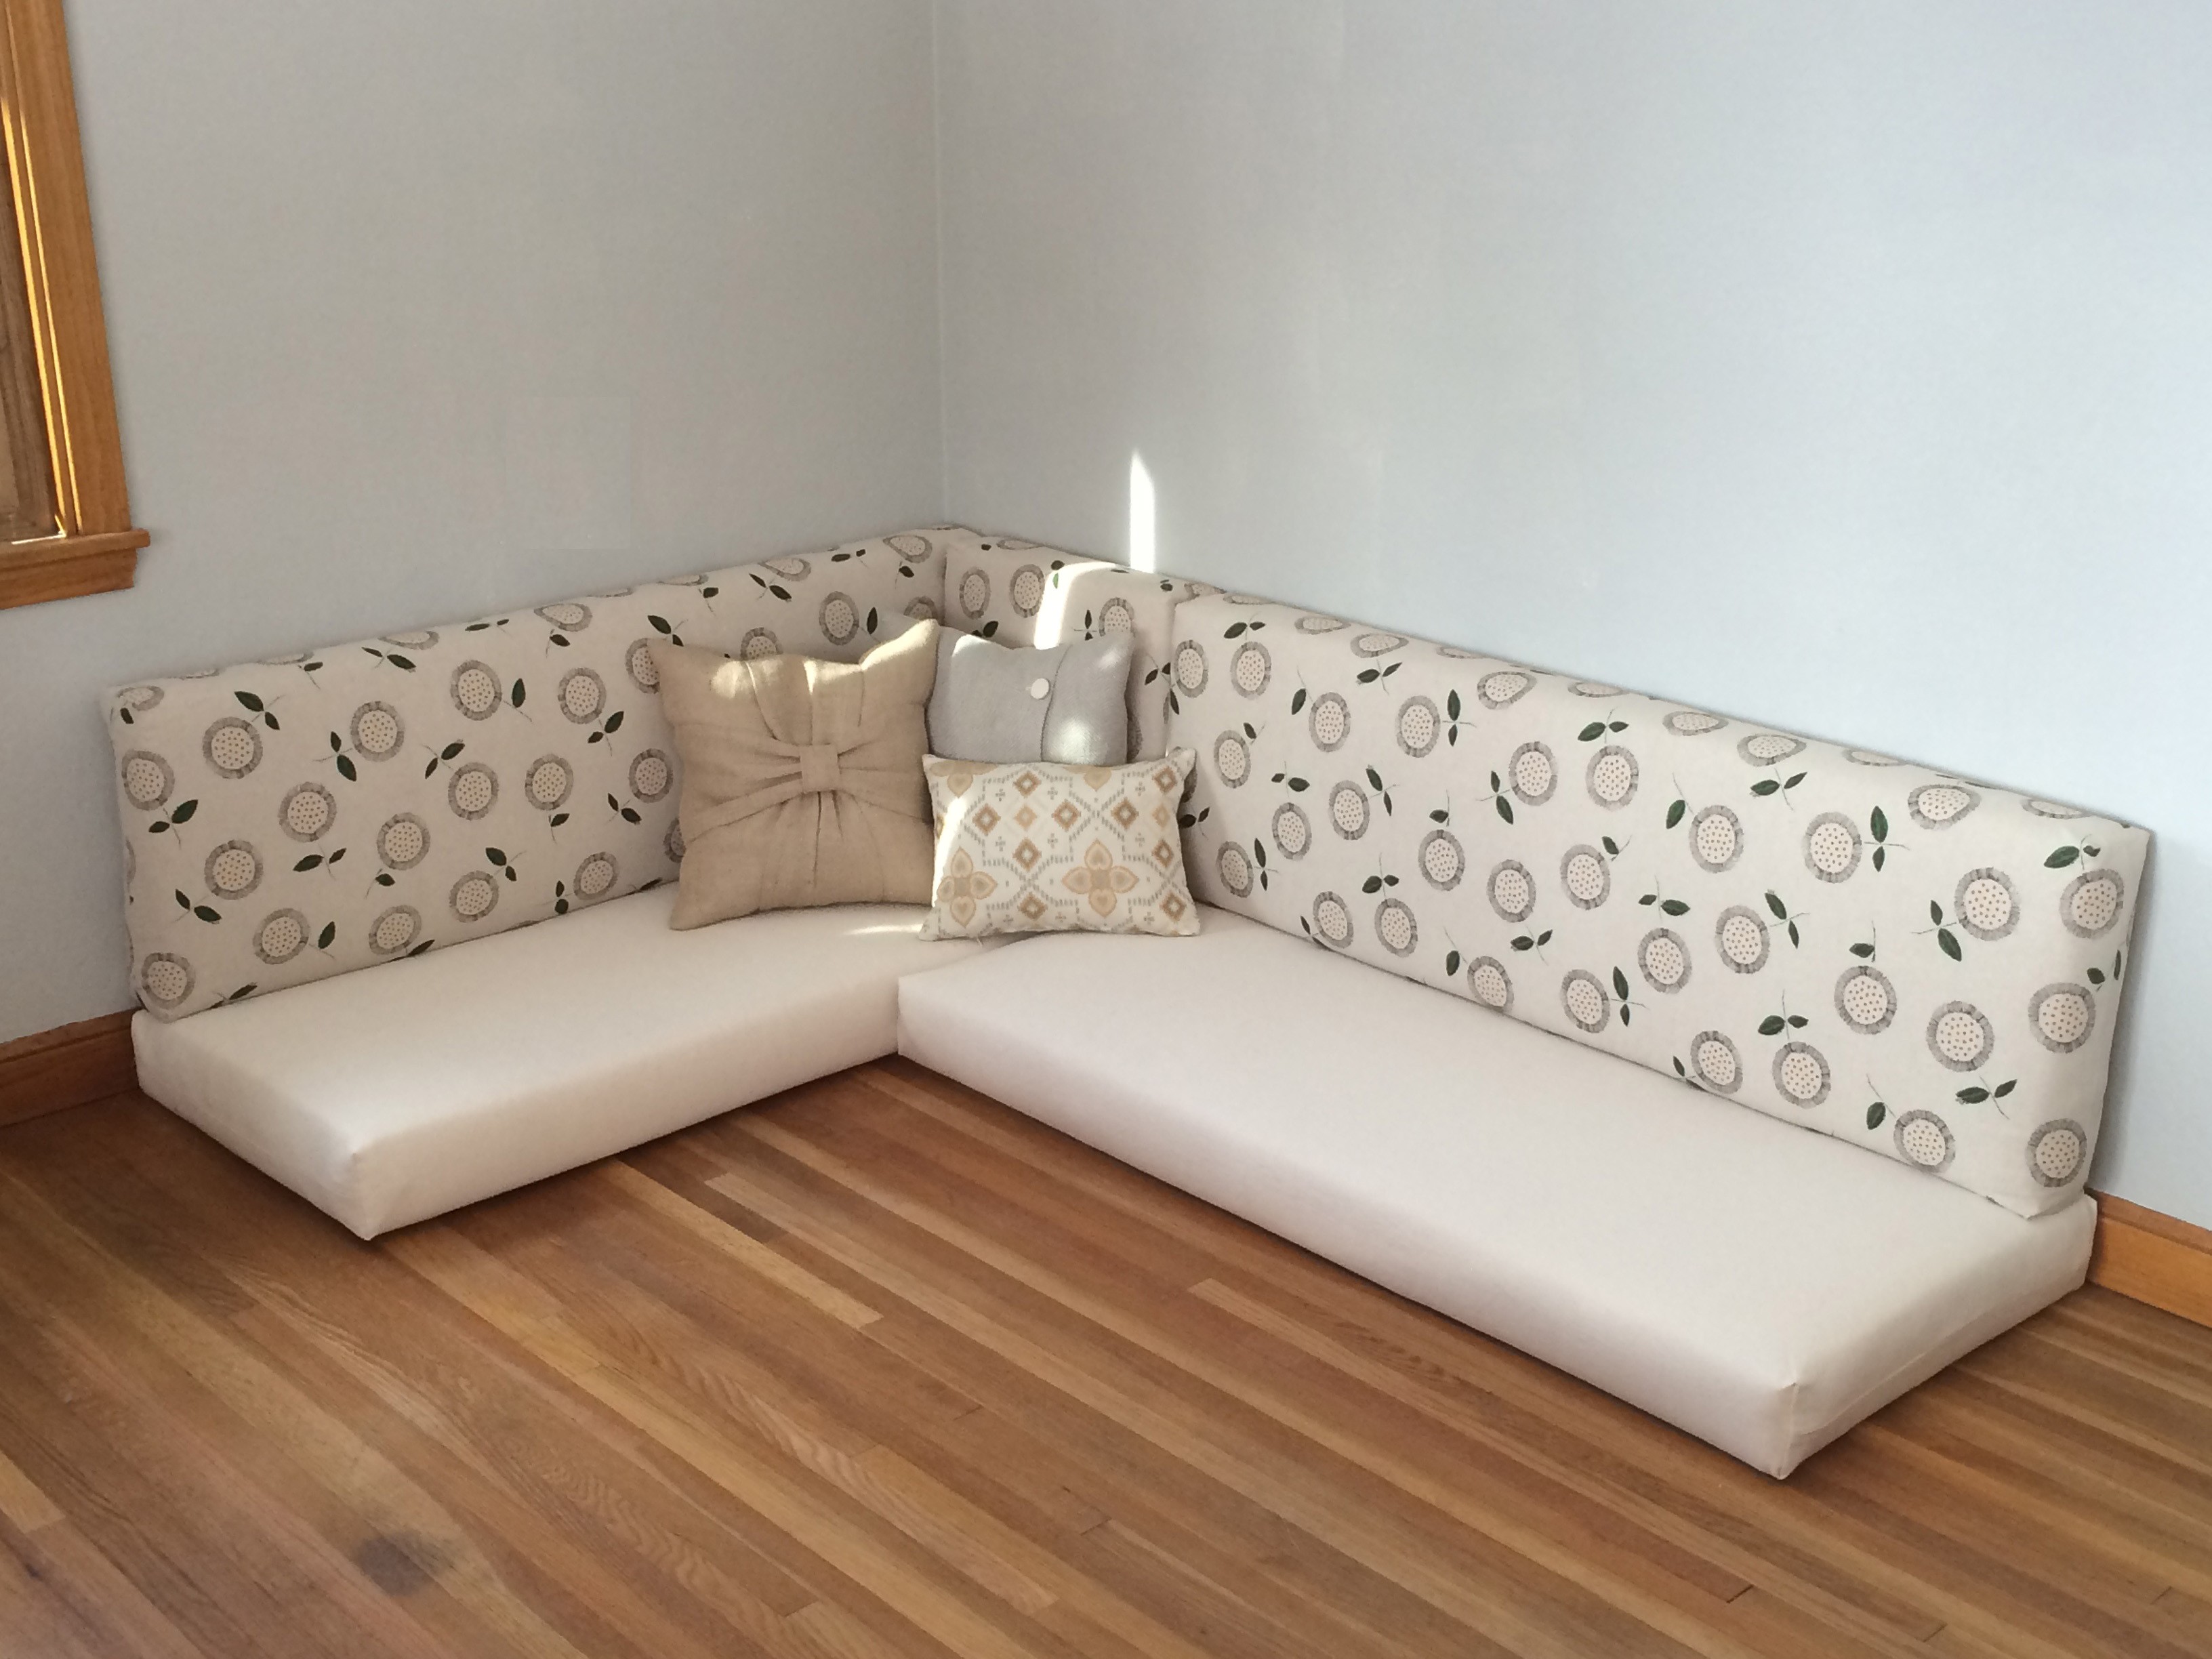
These pieces can be used for couch cushions, bench seats, patio furniture and much more. There is latex for a variety of your project needs, big and small. We would love to see how you get creative with these pieces, by posting your photos under the “Community” tab in “Customer Pictures” on our website.

Order your clearance prices HERE. Please be aware that there is only one piece of each clearance piece available and this list is subject to change as the pieces sell out.

Happy thrifting!

Wool Flake Price Decrease

Posted on Leave a comment
Wool Flake

Wool Flake


I have been getting quite a number of wool mattress inquiries lately. It always excites me to talk to people interested in physically participating in their mattress choice.  However, my wool flake prices, while very fair, have been too high to enable some of your plans. Thus, to share in your creativity, I will lower my wool flake prices. We are here to empower your choices, which we already do in carefully sourcing our wool.  Now let us provide even better conditions for your inspirations. Mattress making ahead!

Wool Flake product is available both in its product as well as in the Pillow Fill Calculator, where you can plug in your preferred depth to know how much wool to purchase.

Here are some useful wool flake links:

DIY wool mattress

Wool Batting Wrap – Why?

Posted on 2 Comments

wool batting wrap, around latex cushion

Wool batting is a sheet of wool fibers, aligned and layered in sheer sheets on top of each other, over and over until the batt’s desired weight is achieved. A wool batting wrap around latex both is used both when making couch cushions and when making a mattress. Here’s why.

SOFTENING

Latex is bouncy.  It has a nice rebound to it that keeps body impressions from lasting like they do in memory foam.  Wool does not have a bounce.  Much of our wool has a crimp to it, which gives it strength and body. A layer or two of wool softens the bounce of the latex and moderates the sponginess feel of the foam.  It also smooths out the edges of the foam for a slightly rounded look.

In a way, the wool is considered a pillowtop to the latex, especially if 2 or 3 layers are used. I usually compare our wool toppers to a medium piece of latex, which would be soft for a couch cushions.

PLUMPING

Wool batting is used to add some puff to your cushion. Sometimes this is an even layer around, sometimes the batting is folded in a pyramid of layers on the top and bottom of the cushions to add a little extra height there and give a rounded look to the cushion.

As I say in the post How to choose Firmness for Couch Cushions #4, all fabric has stretch to it, even a woven fabric like a twill has a slight stretch to it. Think of the way a pair of jeans fits snugly fresh out of the dryer, yet loosely when they go into the washing machine. Another trick besides cutting the latex a 1/2″ larger, is to wrap the latex in the wool batting.  If the case and the latex are made the same size, adding in a 1/2″ a wool batting wrap will provide that the case will still look full after it has stretched its 3%.

METHOD

If you ask us to wrap a latex cushion in batting, we neither staple it, sew it or glue it. We merely wrap it around the latex and let time do the work of adhering the batting to the latex.  The wool fibers will twist in to the latex in about 3 months, leaving it gripping the latex. Wool batting is not sticky like Dacron batting would be, so even without an inner case, the latex wrapped in wool will slip into the outer case easily.   The batting still may be removed if desired, but it will leave behind small fibers in the latex.

SHAPE

How you wrap the organic latex cushion is up to you. Some choose to wrap the entire piece of foam, top and bottom, front and back, sides. Some choose to wrap just the noticeable areas, the front, the top and bottom. This minimal wrap focuses the batting where it will be most useful.  It is called a bookwrap.

If plumping the cushion is specifically your goal, consider layering multiple pieces of the top of the cushion. If the cushion is flippable, do the bottom as well. Layer the batting in a pyramid style with 3-4 wool pieces gradually getting smaller so that you can target the area of plumpness.

While you will probably the wool in pieces, consider “tearing the wool” by pilling apart the fibers. Then tease the edges so that appearance of the wool is gradual instead of a sharp distinction. Tease the edges by pulling the fibers apart so that some are longer and the entire edge tapers.

DIY WRAPPING

We let you participate in your project by cutting the batting and wrapping it around the latex yourself. We will provide you with cutting maps so that you need to do no number work, no figuring, all you need is scissors and a space to work in.  After the cushion is wrapped in the wool, stuff it in your case and zip it shut. Simple.

Popular Mechanics DIY Mattress

Posted on Leave a comment
Popular Mechanics DIY

Popular Mechanics DIY


Popular Mechanics August 2015 issue is a DIY issue.  It is full of DIY ideas, including making your own mattress.  An hour long interview and a few emails produced this short summary of some of our options.  As all of our options are customizable, you may find more accurate numbers if you call me for calculations, but the gist is there: You CAN make your own mattress!

How to choose Firmness for Cushions

Posted on 1 Comment
Natural Latex Cushion

These tips are based on the assumption that the primary purpose of the couch will be for sitting on.  If the comfort of the couch is more important for sleeping on, see The Banana Test for determining firmness.

ORGANIC NATURAL LATEX

  1. Choose firmness based on depth first (there are five firmnesses – D65, D75, D80, D85 and D90):
    For BASE CUSHIONS

    1. 3” or less, get a D85 or D90
    2. 4”, aim for a D80 or an D85
    3. 5”- 6”, pick between D80, D85 and D90

    For BACK CUSHIONS

    1. 1-2″, get a D75 or D80
    2. 3-4” or less, get a D65 or D75
    3. 5”- 6” pick between D65 or D75
  2. Choose firmness based on preference of feel second:
    1. Do you like it firm or like a standard couch, rather cushy? The firmer the latex, the more supportive it is and the less you will sink into it.

Rules of Thumb

  1. In base cushions, D80 is considered medium in couches. D85 is considered medium-firm in couch cushions. D90 is considered firm.
  2. In back cushions, D65 is considered soft and D75 considered medium. Depending on the depth, as a pair, a D65 on the and a D80 on the base work well together, as do as D75 on the back and a D85 on the base,
  3. The thinner the latex, the less firm it feels. Depth can make up for the firmness. A 2” D85 will feel the same as a 3” D80. A 3” D90 will feel like a 4” D85.
  4. The heavier you are the deeper latex you will need. Average adult weight (130-230 lbs.) will not feel the supporting wood or spring foundation or on 5 – 6” of latex if the latex is firm, extra firm or hard. A 300 lb adult will want a minimum of 6” of hard latex or deeper of a softer latex.
  5. Cutting the latex ½” to 1“ larger than the cushion dimensions gives a nice full look. The firmer the foam, the less we will add to the dimensions.

Loose Fills

Do your back cushions have a non foam fill like batting or feathers? Consider using

  • wool batting
  • cotton batting
  • shredded latex and kapok mixed
  • woolly bolas

Our wool batting or cotton batting will be a great substitute for the typical dacron batting used. Both are lofty and will be a soft fill. Over time, they do compress in areas of use. They are sold by the 88″ yard. The battings are also great for wrapping around your cushions, more info here.

Our woolly bolas also make a great feather replacement.  They are always soft, a little dense, as light as a standard pillow. They do a really good job keeping their shape and staying in the whole pillow as opposed to some of the loose fills that sink to the bottom of the case because of their weight. They are also not messy!

A mix, often 50/50 of shredded latex and kapok can also make a soft cushion and even bean bag. On its own, shredded latex is squishy and bouncy; kapok is light and airy.  Together the kapok fills in the spaces between the shreds of latex, making the pillow smoother and giving it more volume without increasing its weight significantly. To be fair, both fills are a little messy to work with. More info on comparing all the different loose pillow fills available here.

If you know the dimensions, you can calculate how much you need here.

On the Air with Jack Kahn

Posted on Leave a comment


Jack Kahn of Its All About Your Health is featuring DIY Natural Bedding in his radio show. His show is deliberately short, only 2 minutes, long enough to suit his purpose of providing food for thought. As he says on his website, “The purpose of the program is to get people to think, ask questions, and to help them avoid making mistakes, or wrong decisions, regarding their health.”

Its All About Your Health airs around the country. Let us know if you heard our being mentioned.


Wool Topper Pattern & Kit now Available!

Posted on Leave a comment

Wool Topper KitWool Topper Pattern

DIY your own wool topper with these supplies and instructions.

We have been looking forward to sharing this DIY option to you for a long time and it is here! We include helpful details like what type of fabric you want and why and how to find free fabric that would work well. Our practicing has chosen the right size needle and the strongest twine.  The prototyping is done for you. Now create!

Using a very easy pattern, few supplies and minimal labor, you can create your own wool topper. Locally grown, carefully sourced wool could top your mattress, providing you with a smooth, flexible surface to sleep atop.

A wool topper pattern is available by itself as well as a wool topper kit, which includes the pattern as well as supplies. New supplies have appeared in the Supply section just for this project: twine and a 5″ tufting needle.

If you make a topper, please send us a picture! We would love to showoff your handiwork for you!

Shearing Season is Here and so is our Wool!

Posted on Leave a comment

Spring has come and with it, warming weather and sheep ready to lose their winter coats of wool.  We are in hands on pursuit of great wool for our products this year.

With a need of 3500 lbs. of wool for a run of our own wool blankets, plus more for our wool batting products (toppers, comforters), we have purchased a total of 4765 lbs. of wool.  Do you think it will last us until next Spring?

NOTE: We have sold out of the blankets made from this batch of wool and do not anticipate making more. The blankets are beautiful but the cost was far beyond what we calculated and some of the small businesses we used to complete the project have gone out of business.

We are glad to include in our roundup two farms that we have worked with previously:

Sunbow Farm – Eau Claire, WI

Together Farms – Mondovi, WI

We have also added more shepherds to the list:

Sutton Ridge Farm – Jordan, MN

Silver Valley Farm – West Lafayette, IN

Daylight Family Farm – Evansville, IN

Hunter Dorset – West Lafayette, IN

Kennedy Southdowns – Shirley, Indiana

Ralph Strutz – Arcanum, Ohio

Chad and Callie Leader – Crawfordsville, IN

MP Club Lambs – Wingate, IN

Woolly Bolas – New Product!

Posted on Leave a comment


A lot of inquiries have come through lately for woolly bolas, small wool balls. They are lightweight and rather fluffy twisted bits of wool fiber.

They are made fairly simply:

  1. Sheep are pastured and cared for.
  2. Sheep are sheared.
  3. The wool is washed.
  4. The wool is picked by a machine to remove the burs and other stubborn vegetation.
  5. The wool is usually carded, a machine which brushes the fibers into a sheet, untangling their knots and smoothing them out to make batts or rovings or the start of many other wool projects.  However, when the carding machine runs backwards, instead of brushing and layering the fibers into sheets, it twists the fibers into small wool balls commonly dubbed bolas.

We feature woolly bolas both in our Wool category and our Supplies category. They would make great stuffing for a pillow or any craft you need stuffed. Since they are lightweight, you will need only 1/2 as much as you would wool batting.

Why are they named bolas? Bola means ball, in a few different languages. Did anyone else beside thinking of the weapon, think of the spider who makes silk bolas to catch his prey with. I guess those nature radio shows I listened to as a youth did leave some lasting learning.

Custom Calculators

Posted on Leave a comment

Creativity drives us here at DIY Natural Bedding.  Sometimes we create because we must; sometimes because we see a need for an item; other times because we like to make a choice not just logically but tactically; sometimes because we need to feel the freedom that in creativity is limitless; because we have time to fill. I know that you are a creative crowd too, because here you are, on a DIY site, searching for something you can create.

Custom Work

We want to help you create, repurpose, and invent, no matter your level of inspiration, motivation, or skill so we have created a new menu in the shop: Custom. This menu will give you three tools to help you in the planning stages of your project.  Use them and feel free to contact us with any questions.


Custom WorkOur Custom Sewing page gives you details on our sewing work. As with our ticking, we go to either extreme and in between: We can supply you with fabric or we can sew up and stuff your fabric for you or most interesting for us, we can create you an entirely new design never conceived before.


Custom Cut Natural Latex

Our Custom Latex Cuts will give you the price of a piece of latex you want us to cut for you.  We can cut standard angles or even your odd shapes like for a boat mattress or a crescent nursing pillow. If you want to cut your own, check out the Clearance section for a variety of depths and firmnesses.


pillow fill calculatorOur Custom Pillow Fill Weight Calculator is a very useful tool if you want to know how much fill a shape.  Are you making a bed pillow, a dog bed, a bean bag chair, a pincushion? With three simple steps, you can know how much fill you might need for your project. Enter in your dimensions, pick your shape, and choose your type of fill to see a total weight provided.  Square cubic inch measurements are also provided for your mathematical pleasure.

Happy DIYing.

Pillow Sizes Changed

Posted on 1 Comment


NEW OLD
Standard: 20″ x 26″ Standard: 19″ x 24″
Queen: 20″ x 30″ Queen: 19″ x 28″
King: 20″ x 36″ King: 19″ x 33″

The difference between our previous size and standard sizes is small, only 2-3 inches depending on the pillow label; however, we wanted to give you those extra inches that you might be accustomed to.

Funny thing is shredded latex pillow sizes are not standard, mostly nowhere. Each company has their own standard size, for example here are the first three numbers a web search produced: 17″ x 25″, 16″ x 25″, 18″ x 24″. Despite the industry’s inconsistent variations on latex pillow sizes, since we offer cases alone without fill and since we want your bed setup to be as aesthetically pleasing as possible, we will standardize our sizes to the above numbers.

We still can make any pillow size you like. If you have a pillow of our old size and you would like to purchase a second matching size, let us know and we’ll sew you a new case for no extra charge.

And if you need anything custom project sewed, we’re happy to help.